Tosa Manual
First steps on the Tosa Platform
Logging into the Tosa Platform
To access your account, go to www.tosa.org, click on Your Account – then choose Administrator from the popup menu.

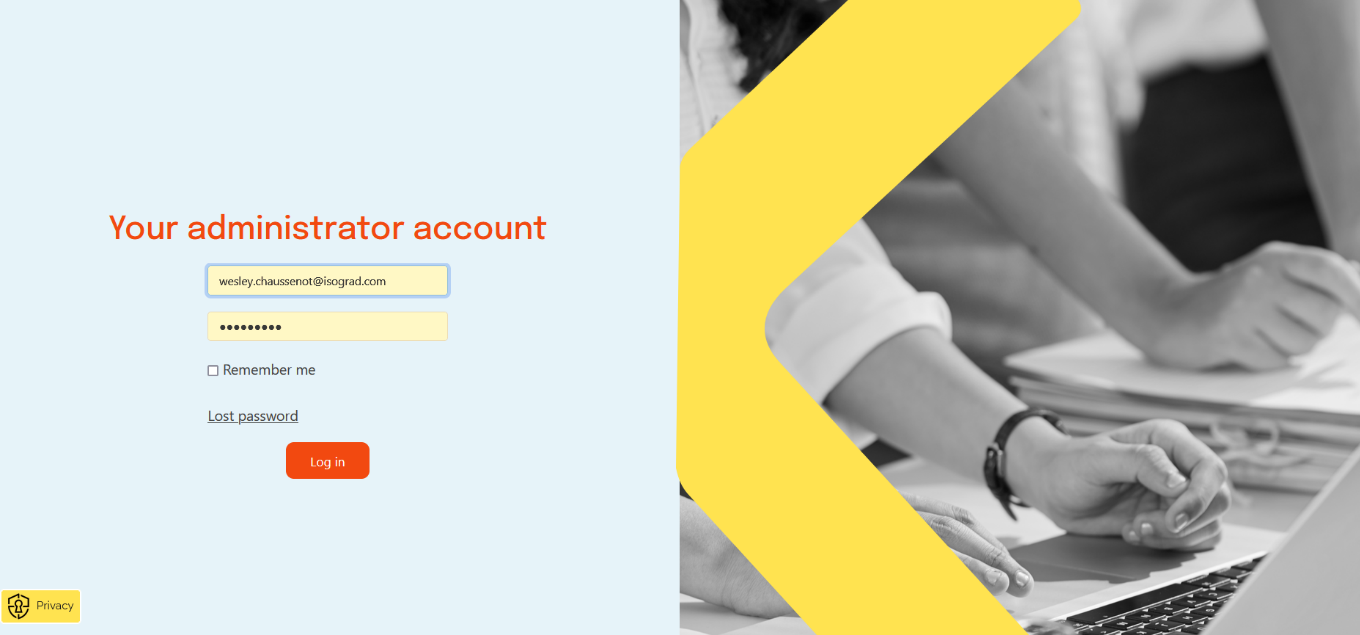
Enter your email address and your password, then click on Log In.
If you do not know what your password is, click on the Lost password link. A password change link will be automatically emailed to you.
Navigate the Tosa Platform
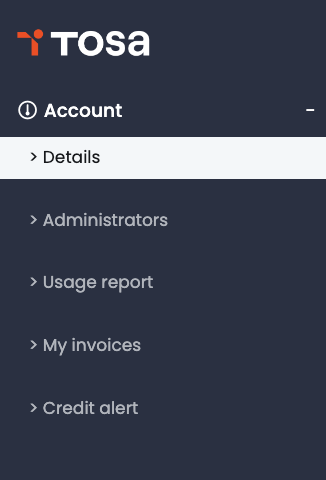
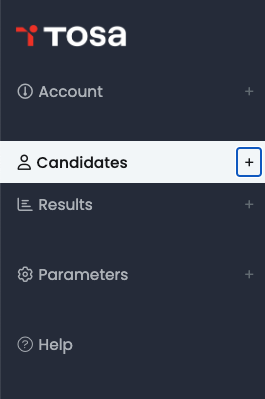
The main menu allows you to access to the five submenus on the Tosa platform, which allows you to manage your Tosa account.
Managing your account
Details
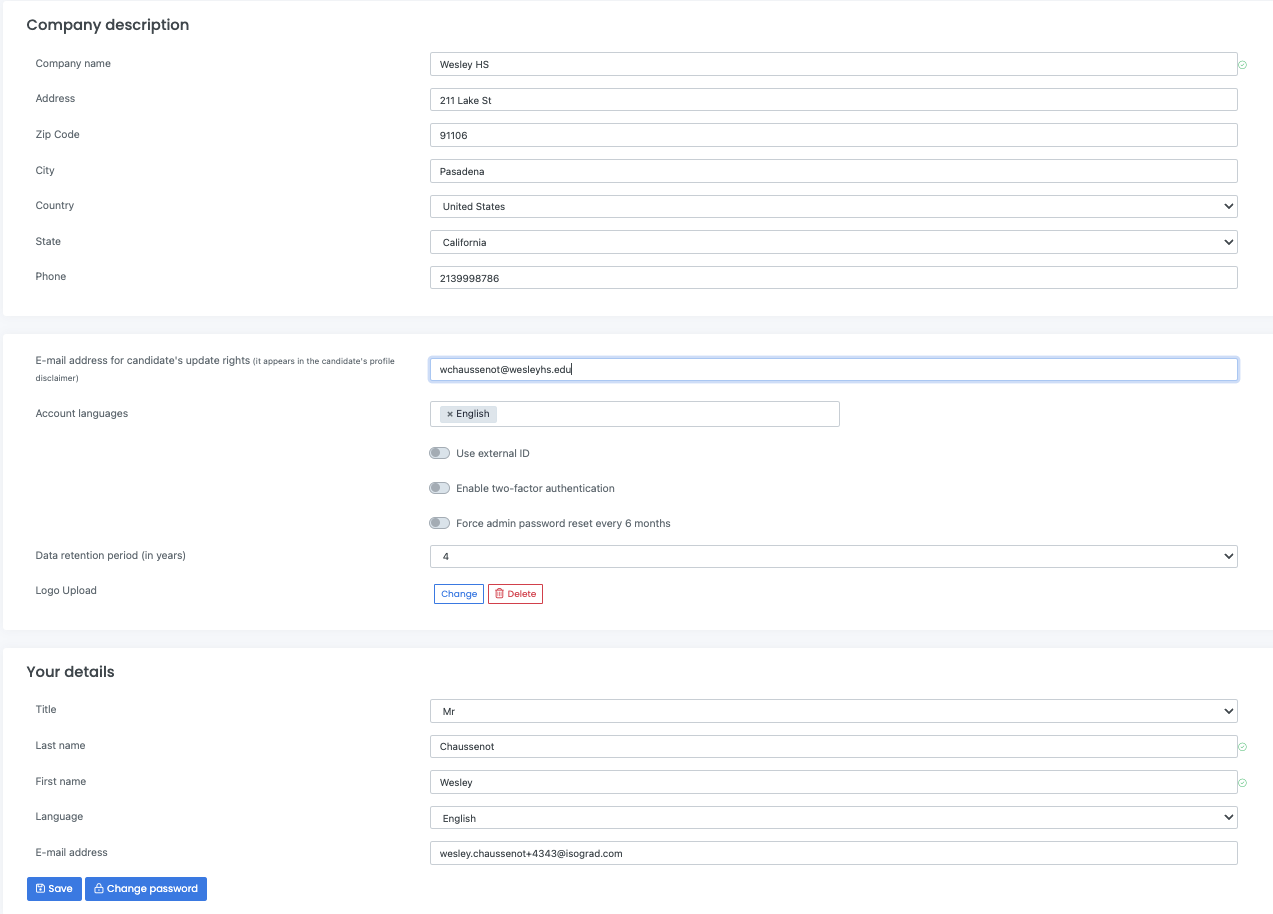
You will find below all the information regarding your account and your administrator profile.
You can upload le logo or your School/Company by clicking on Change (Logo Upload). This will enable it to appear on your students’ test results reports.
Administrators

The administrators manage groups. Each group requires one administrator.
Adding an administrator
To access the Administrators management tools, click Account on the main menu. Then click on Click on Administrators in the submenu.
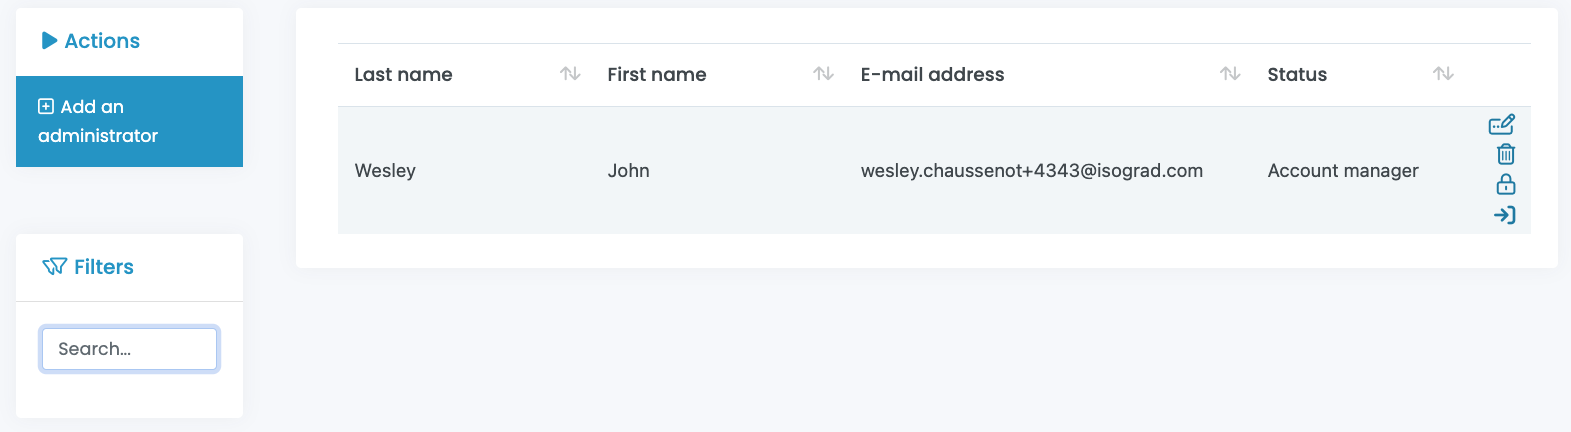
The Administrators management page opens. You can add an administrator by clicking Add and administrator. You can also view all of the administrators that have been created.
Types of administrators
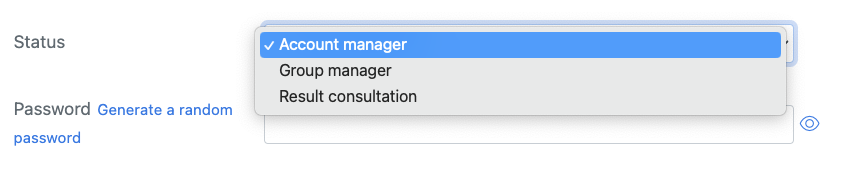
There are 3 types of administrators on the platform:
-
Account manager: The account manager has complete administrative rights and can view and modify anything on your account.
-
Group manager: The group manager is only able to access and modify students within the group(s) they have been assigned to manage, along with the students from public groups.
-
Result consultation: The result consultation administrator is only able access the results of the students from the group(s) they have access to, along with the students from public groups.
Modifying administrators
Account managers can modify the status of existing administrators by dragging by hovering the cursor over the administrator you want modify and clicking on the Edit icon.

You can also delete an administrator by clicking on the little bin icon, and reset an administrator’s password by clicking on the little lock icon.
Credit alert
The Credit alert page allows you to create up to two credit alerts and easily track your credit consumption.
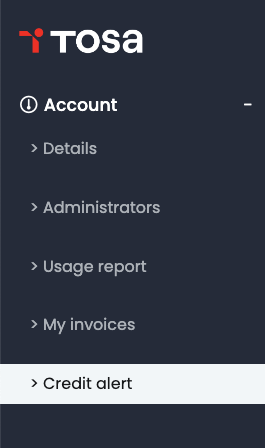
Click on Account in the main menu to access the Your Account page, then click on Credit alert.
The Expiration date alert allows you to automatically receive an email one month before your credits’ expiration date.
The Low credit alert allows you to set a threshold (minimum credits remaining) to receive an alert by email.

Usage Report (credit consumption)
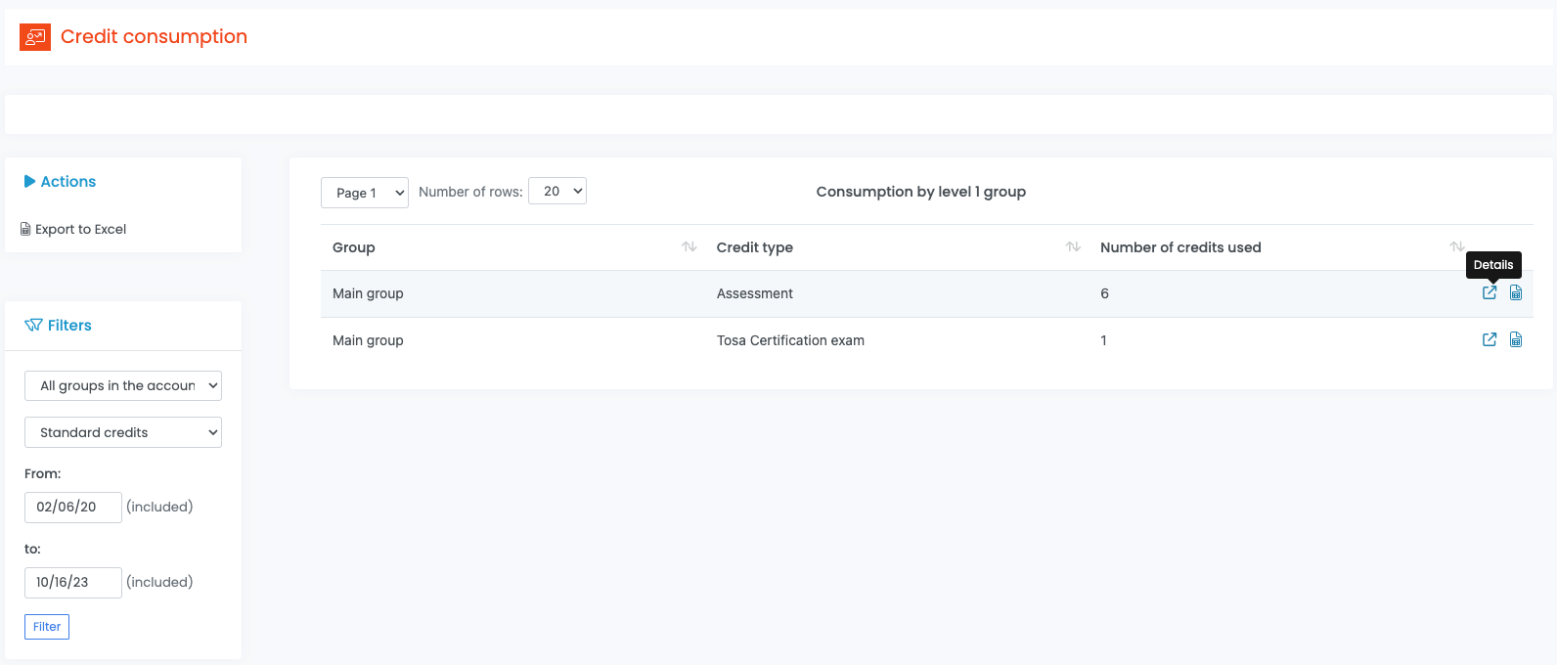
- The Usage report page allows you to track total credit usage as well as usage by group.*
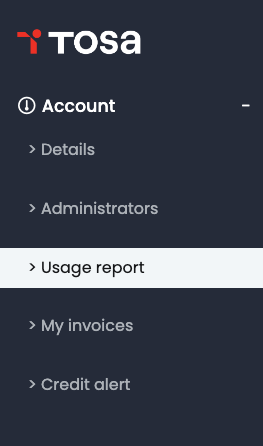
From the Account page, click on Usage Report.
Select the timeframe you want to review usage and click Filter. You will then see all groups that are part of your account. You can sort this data by Group, Credit Type, or Number of Credits Used.
To review the specific details on a specific group’s consumption click on the Details icon on the right hand side.
Invoices
If you have made online purchases for Tosa assessment or certification credits online, this is where you will be able to view and/or download your invoice(s).
From the Account page, click on My invoices.
Here you will see the transaction date(s), product description(s), and the amount for each invoice.
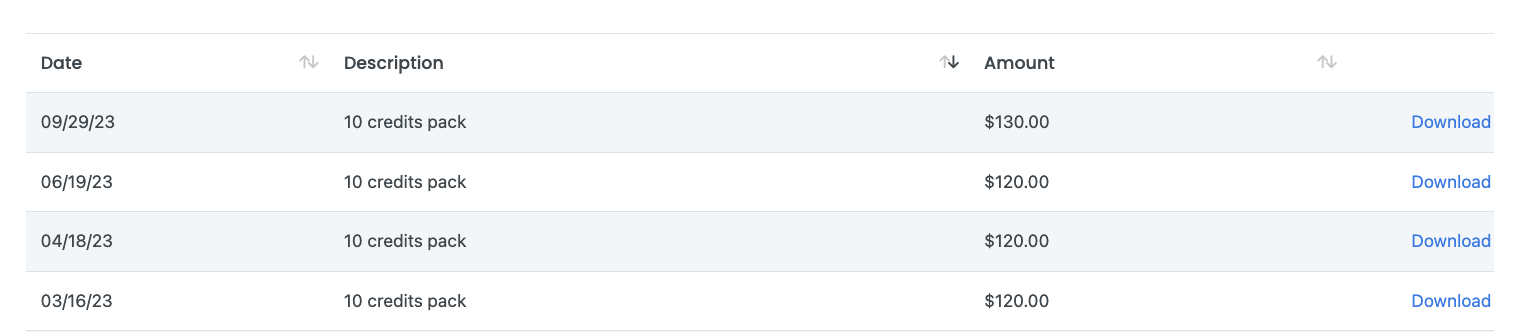
You can download an invoice for any online purchase by clicking on Download.
Managing the parameters
Emails
To notify students that they have been assigned a test, you are provided email options.
To setup your email options it is recommended that you start by setting up your email templates.
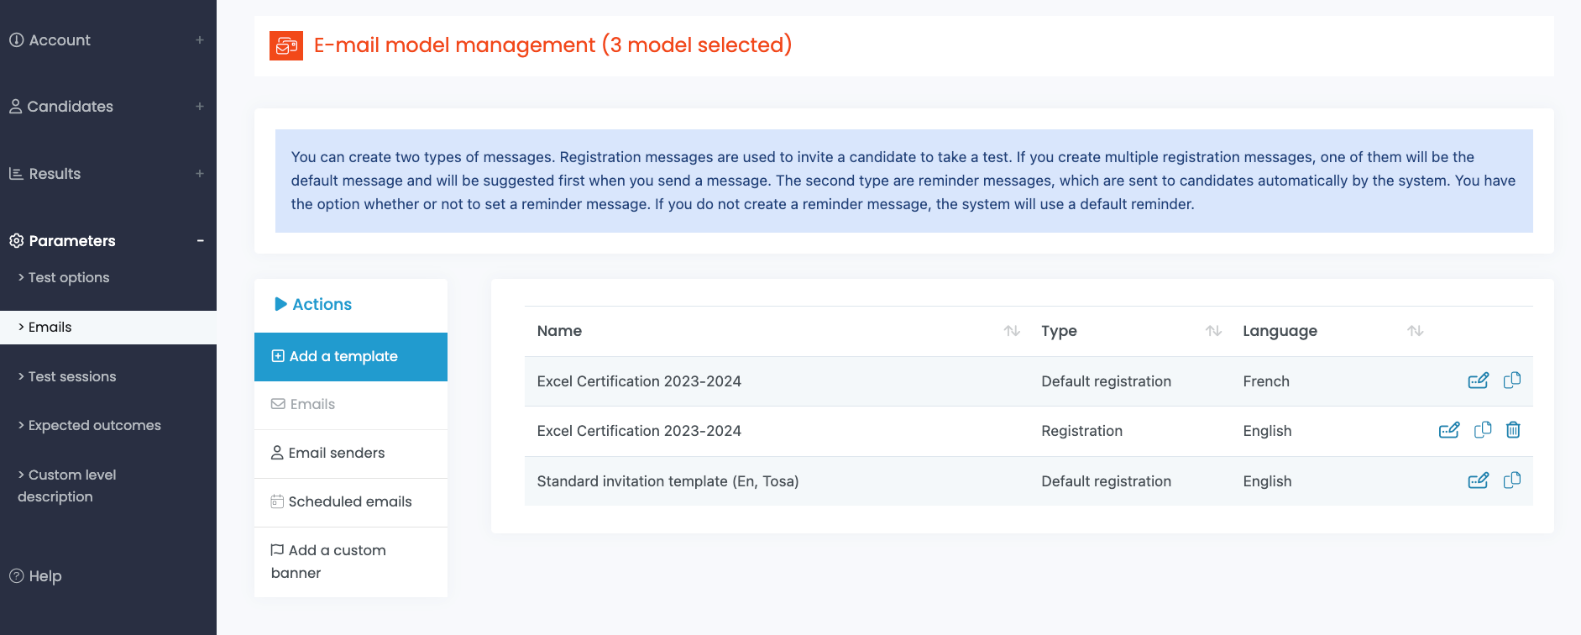
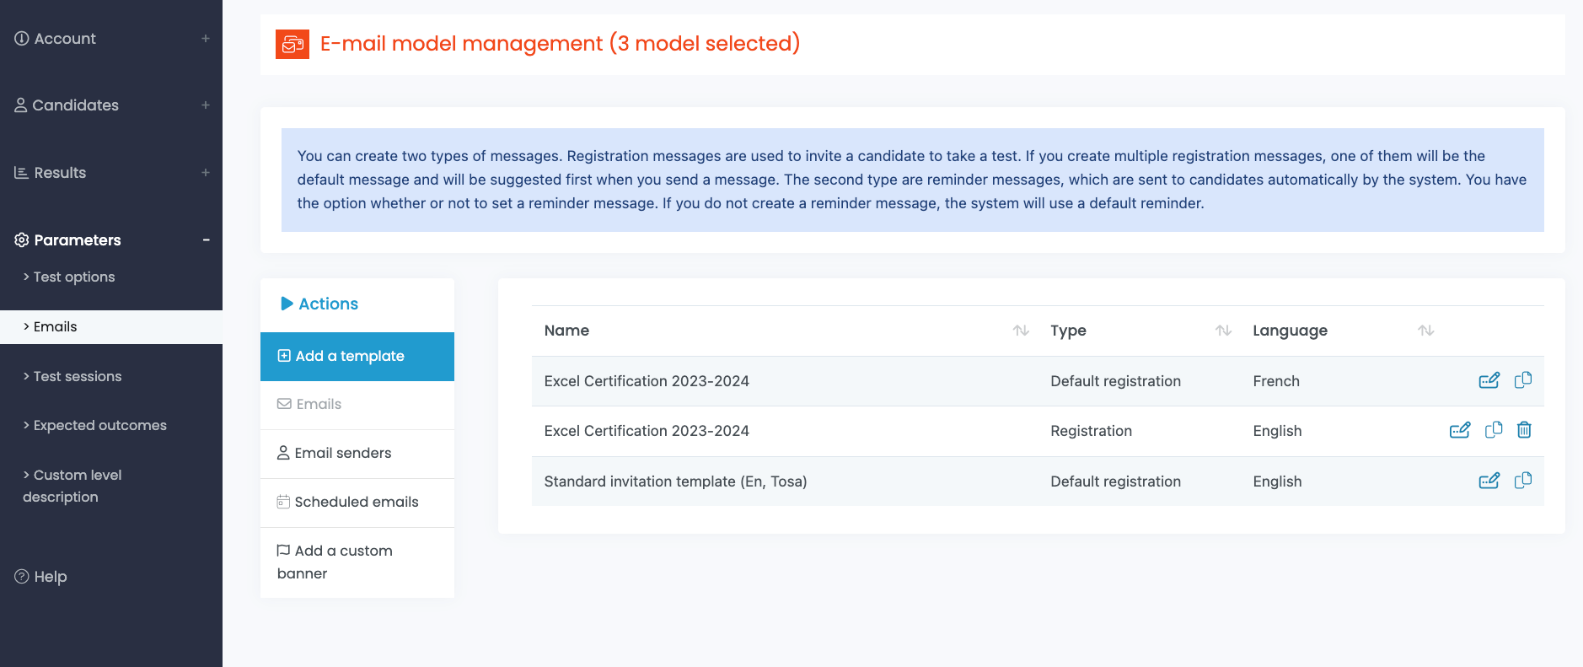
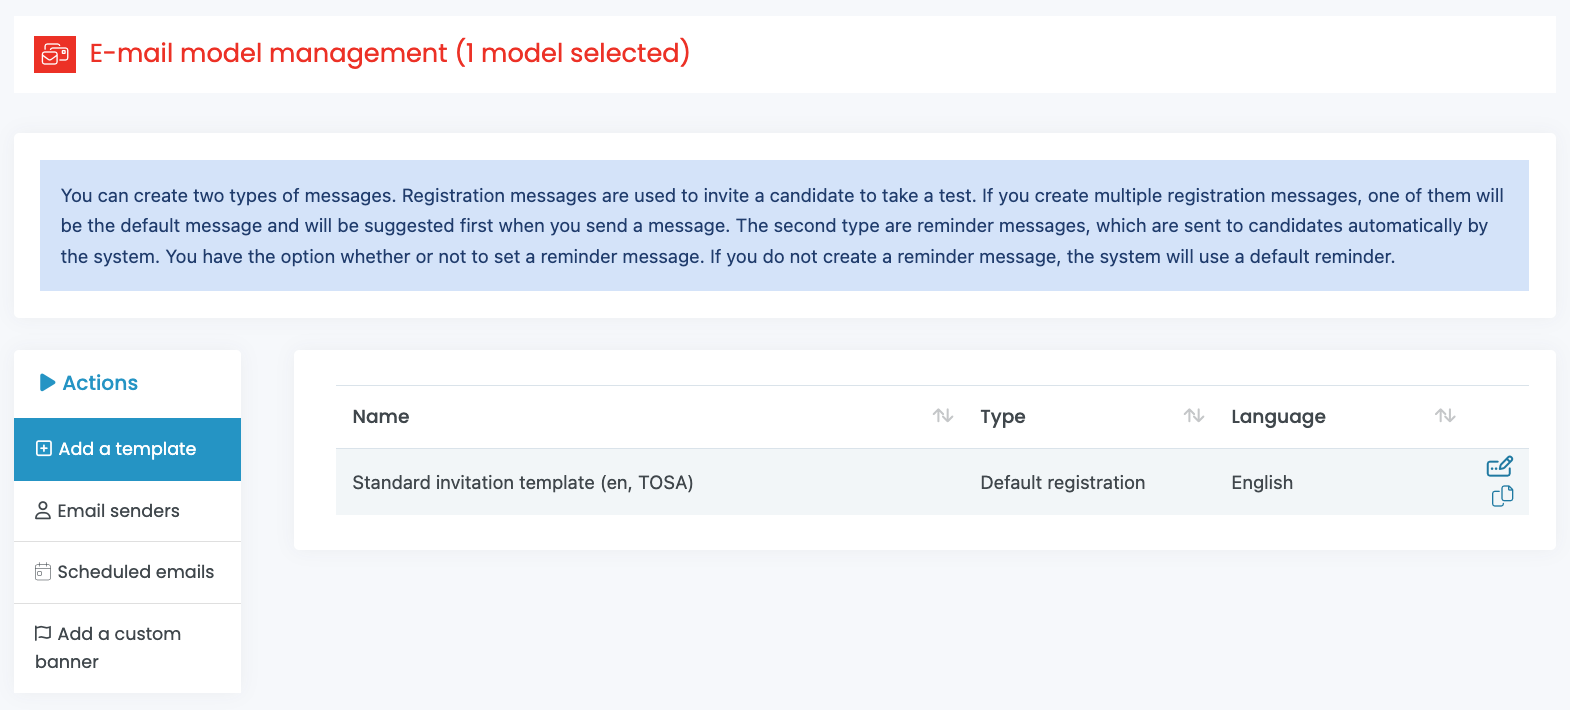
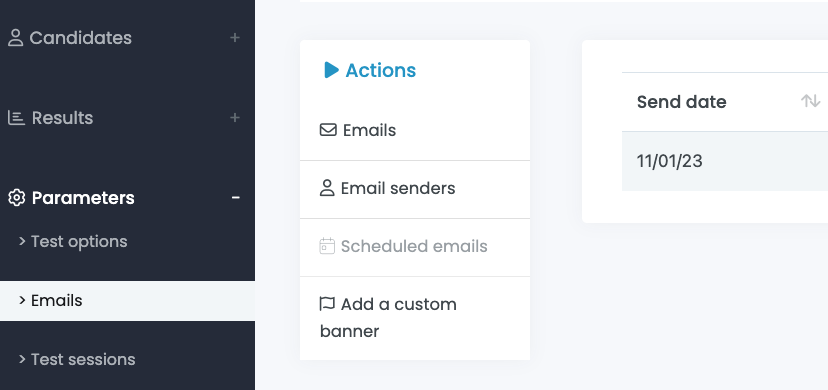
To access the email templates, click Parameters on the main menu. Then click on Emails. The E-mail model management screen will appear by default.
If the email templates are not showing, click on Emails under the Actions submenu, then you will be able to review and manage your templates.
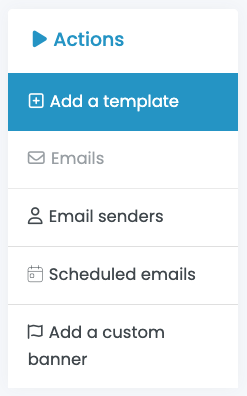
A standard invitation template is provided on your account. You can modify or duplicate the standard template.You can also create your own email templates, as well as email reminders that will automatically be sent to your students by clicking on the Add a template button.
If you need to modify an existing email template, drag your cursor over the template and click on the Edit icon.
The Update an E-mail model window opens. This is where you will be able to customize your template.
You are able modify the template name, the default subject line, and the first sentence (greetings).
In the “First part of message” and the “Second part of message” boxes you can draft specific messaging for the template.
You are also able to include the scheduled test(s) and the student’s login ID/password. The check boxes for these options should always be checked.
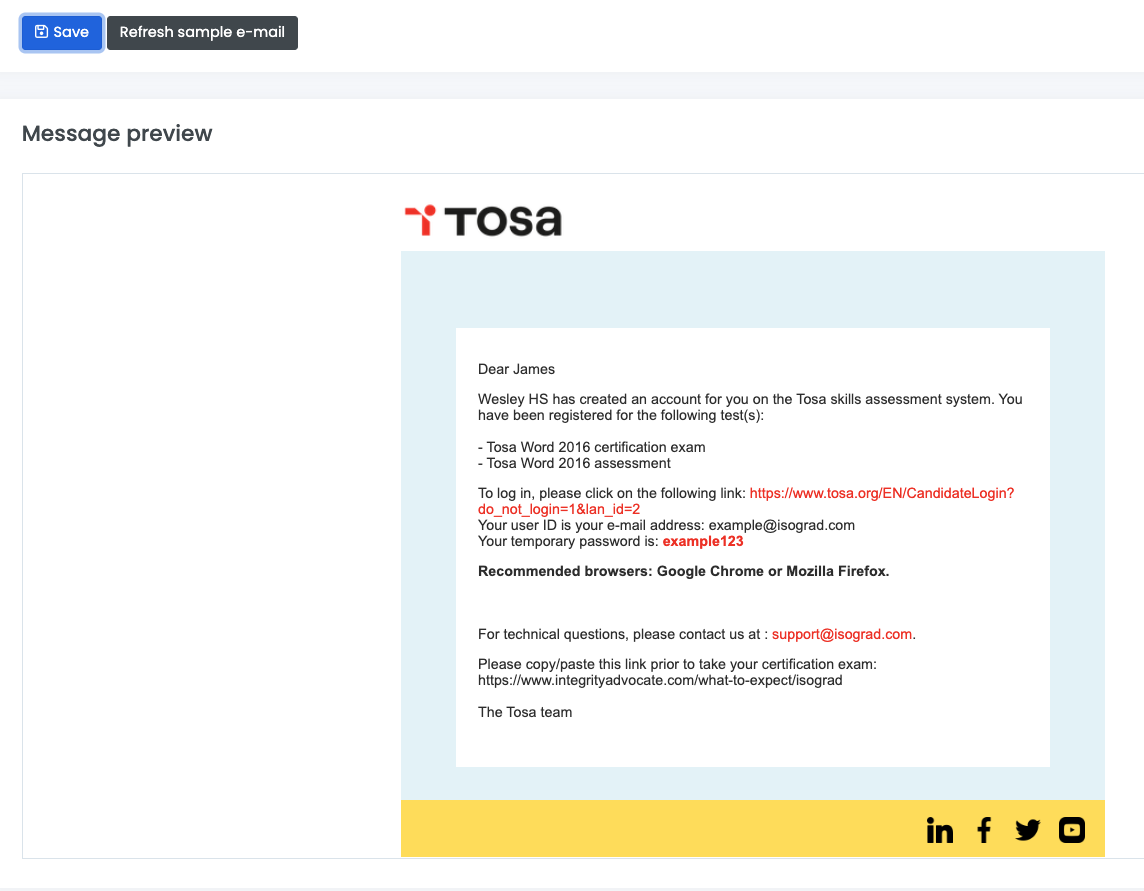
To review the completed template, click the Refresh sample e-mail button.
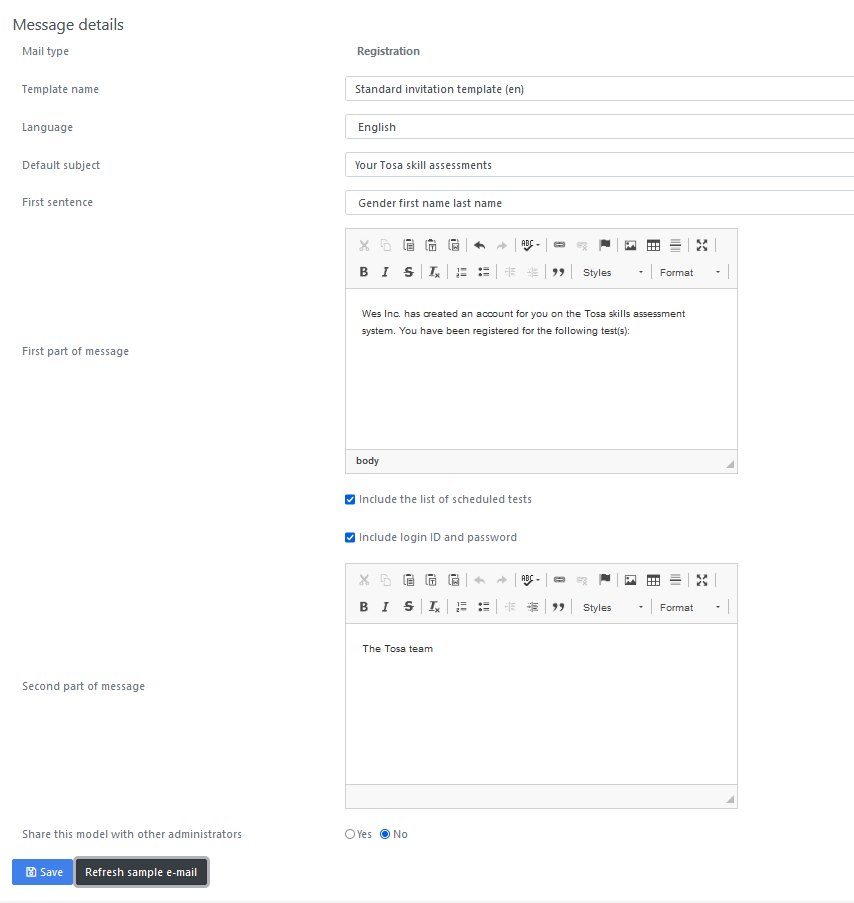
Once you have modified the template details click the Save button to save your changes. These settings apply to all email types (registration, result report, reminder, diploma).
Email senders
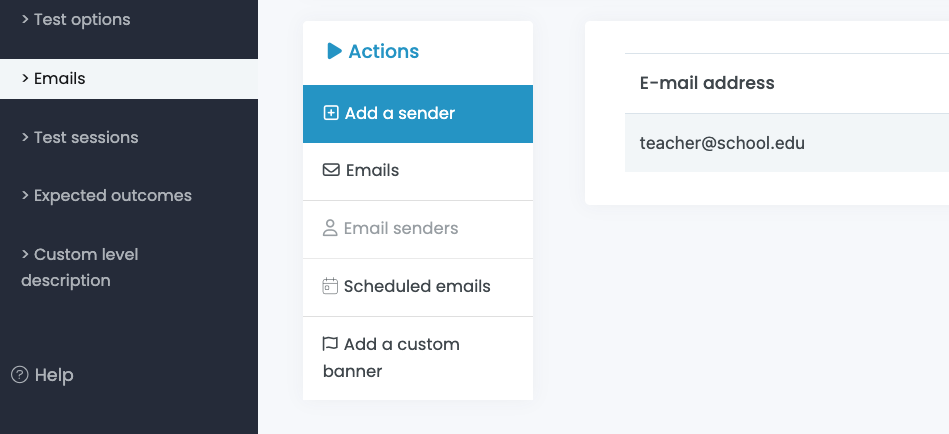
A sender is an email address that the system will use to send emails instead of the default email address noreply@isograd.com. This option allows email to be sent from an email address from your domain.
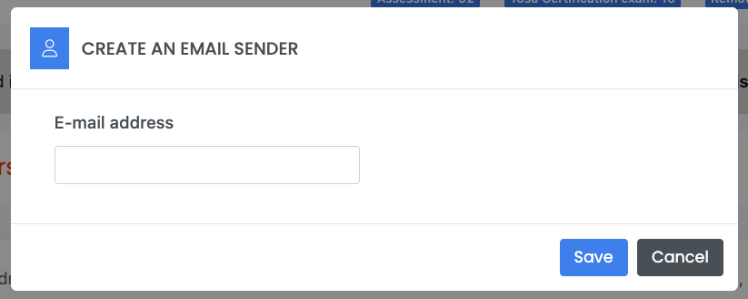
To create a sender, click on Parameters, then Emails, Email senders and Add a sender.
Input the email address of the sender in the email address box and click Save.
The email address owner will receive an email from Amazon Web Services asking them to grant the right to send emails on their behalf.
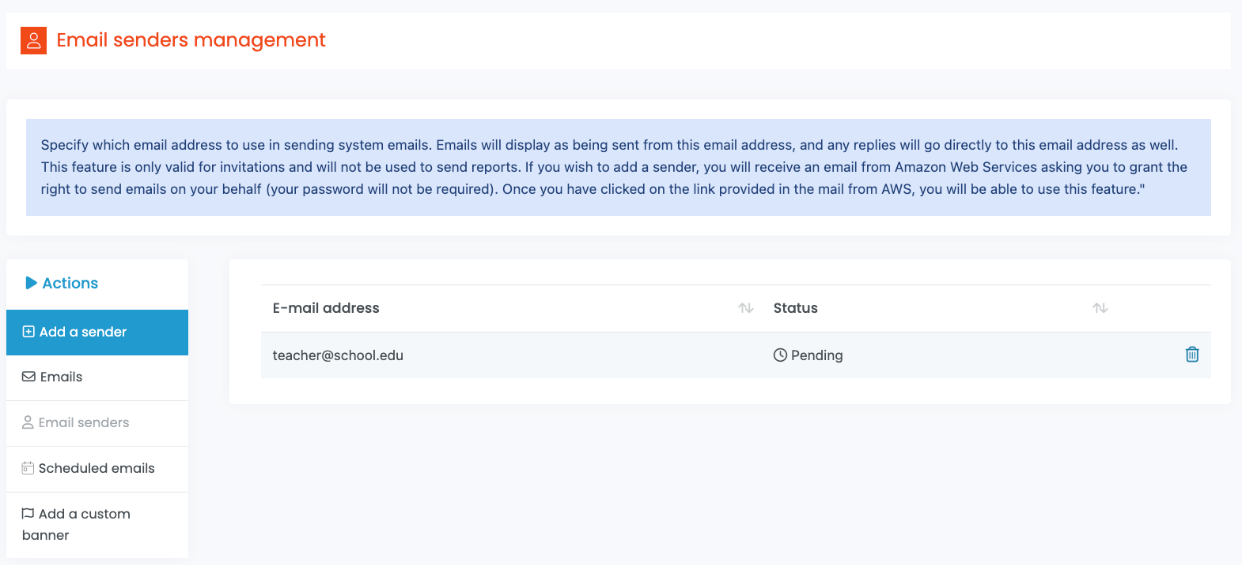
The email address must be verified by the recipient by clicking the link provided in the email from Amazon Web Services. It will show Pending until verified and the process can take up to 45 minutes after the link has been clicked and the rights granted.
Scheduled emails
This is where you will see your scheduled emails. This option is set when you are about to send a test email invitation to your student(s) (see Candidate menu)
Adding a custom banner
You can personalize your emails by including your own banner or logo. To accomplish that, click on Email templates, then Add a custom banner option. Follow the import image instructions to upload.
This will replace our Tosa default logo with your own.
Creating test sessions
A test session is a specific time period during which tests are required to be taken. Tests linked to a session will not be accessible outside of the scheduled testing session.
Creating a session will allow you to set a start and end times. Then, when you register a student for a test, you will be able to link the test to an established test session.
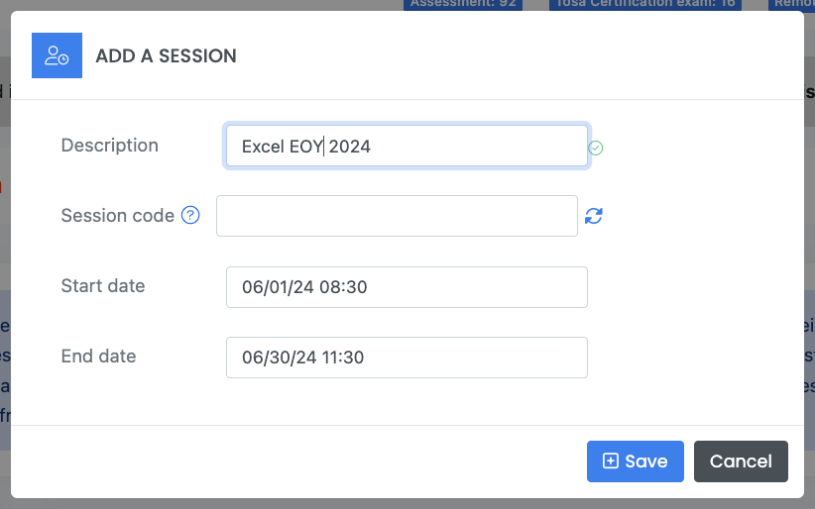
To create a test session, click Parameters, then Test sessions, and then the Add a session button.
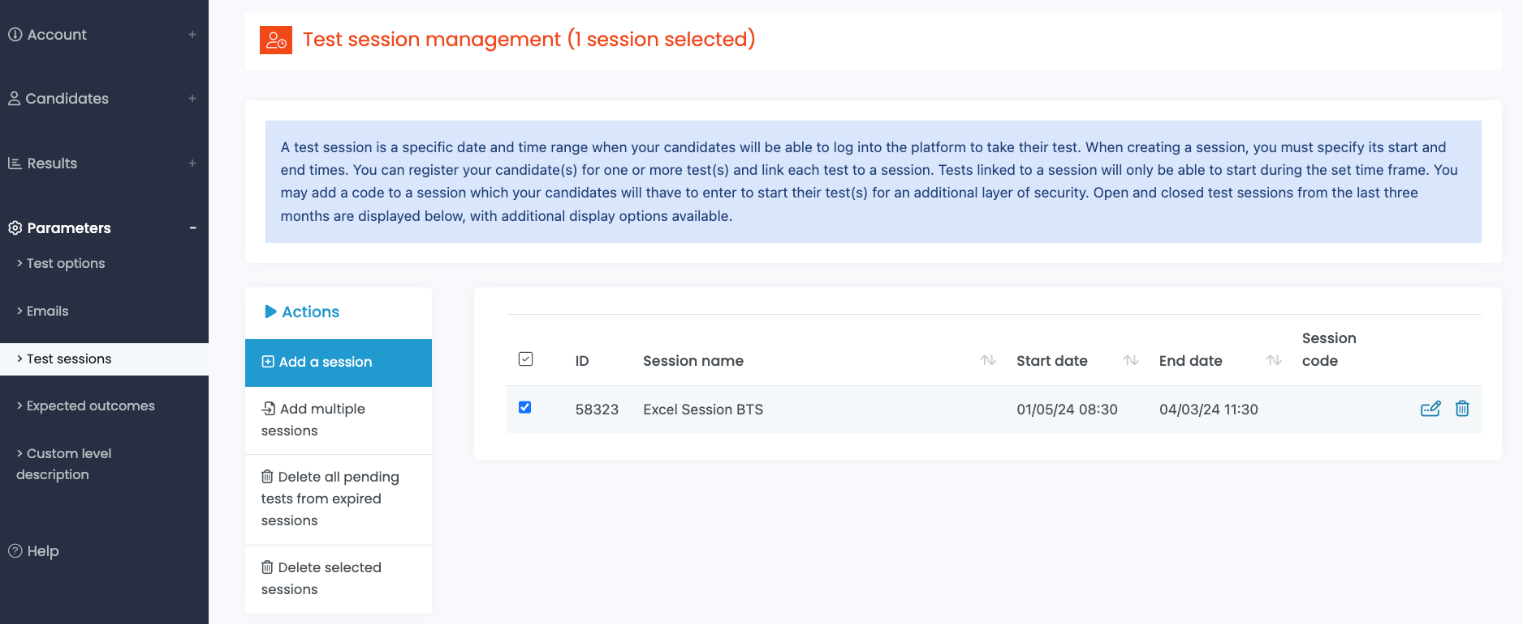
In the Add a session window, you can add a description/title for your session as well as a Session code, the start date and end dates, and the start and end times.
Adding a session code is recommend so that students are not able to start a test until the code is provided. Session codes are never sent by email, but the code is provided to the student(s) by the proctor when they are ready to begin their test.
Adding multiple test sessions
To create multiple test sessions at once, click Parameters, then Test sessions, and then the Add multiple sessions button.
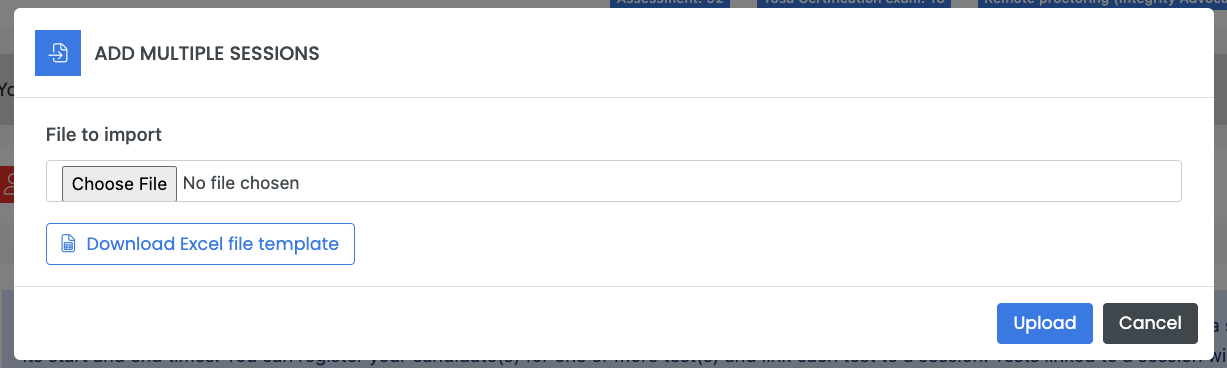
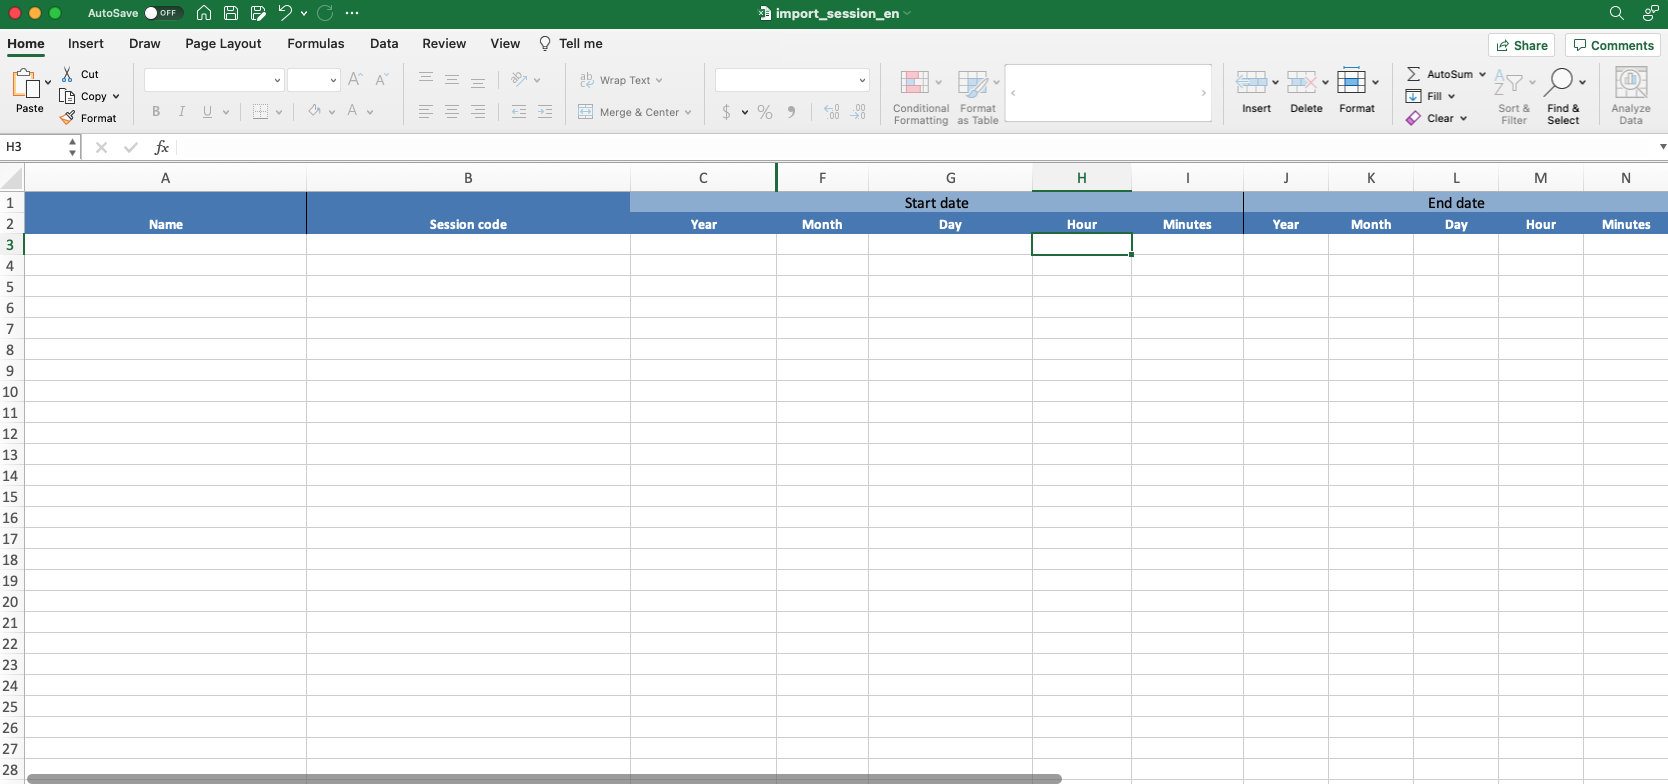
The Add multiple sessions window will allow you to download the Excel file template via the Download Excel file template button, to fill it out, save it on your computer and to upload it back to the platform via the Choose File button.
You will be able to delete the pending tests from expired sessions by clicking the Delete all pending tests from expired sessions button, this will allow you to get the credits back to your credit bank.
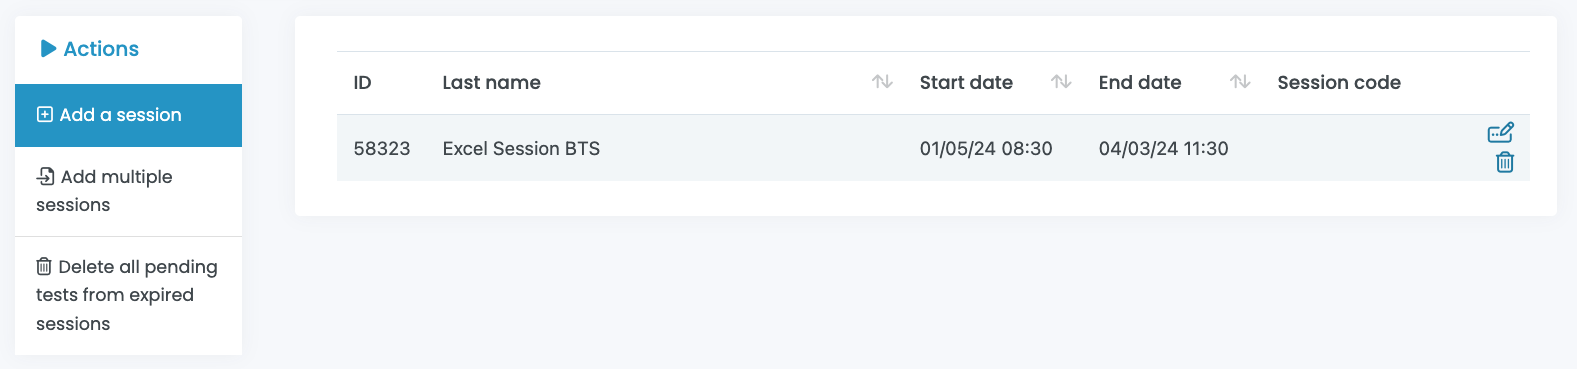
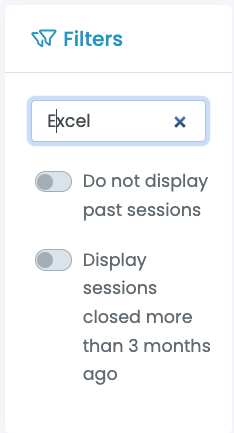
Use the filters to search a session using keywords.
Toggle the Do not display past sessions button if you want to hide expired sessions without deleting them.
You can also toggle the Display sessions closed more than 3 months ago Button if needed.
Test options
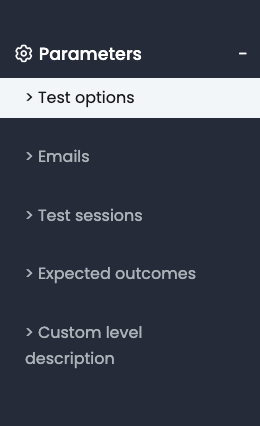
The Test options menu will allow you to define and/or update your testing environment’s default options. Access the Test options through the Parameters menu.
General settings
The Manage default options page will allow you to set the default settings for your account.
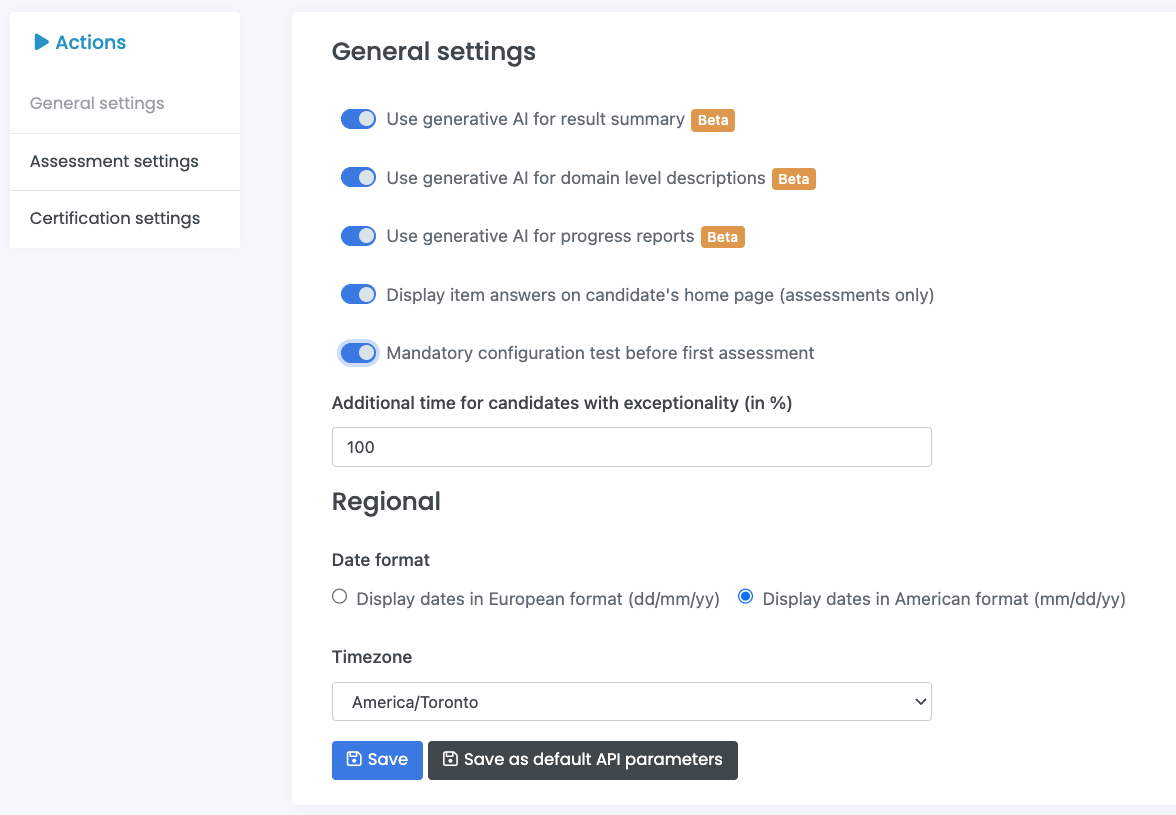
1) Use generative Artificial intelligence for result summary:
Enabling this option will allow you to get a more precise result summary on your students’ report(s).
2) Use generative Artificial Intelligence for domain level description:
Enabling this option will allow you to get a more precise analysis on each assessed domain & skill.
3) Use generative Artificial Intelligence for progress reports:
Enabling this option will allow you to get a more precise analysis between two tests on the same subject (between two assessments or between an assessment and a certification.
4) Display answers on candidate’s home page (assessments only):
Enabling this option will allow for your students, after completion of an assessment, to see the questions and their answers.
5) Mandatory configuration test before first assessment:
Enable this option if you want your students to take a (one-time) short 3-question configuration test when they log into their account for the first time.
This test’s goal is to familiarize your students with the platform as well as to see if their computer and network environment is compatible with the tests. We strongly recommend enabling this option.
Set your Time zone and make sure the dates appear in American or European format. You are also able to Add additional time for students with exceptionality. As you will be able to adjust the additional time value individually in the Candidate’s record, it is recommended to set the global value to 100%.
Once you have customized your settings, click the Save button.
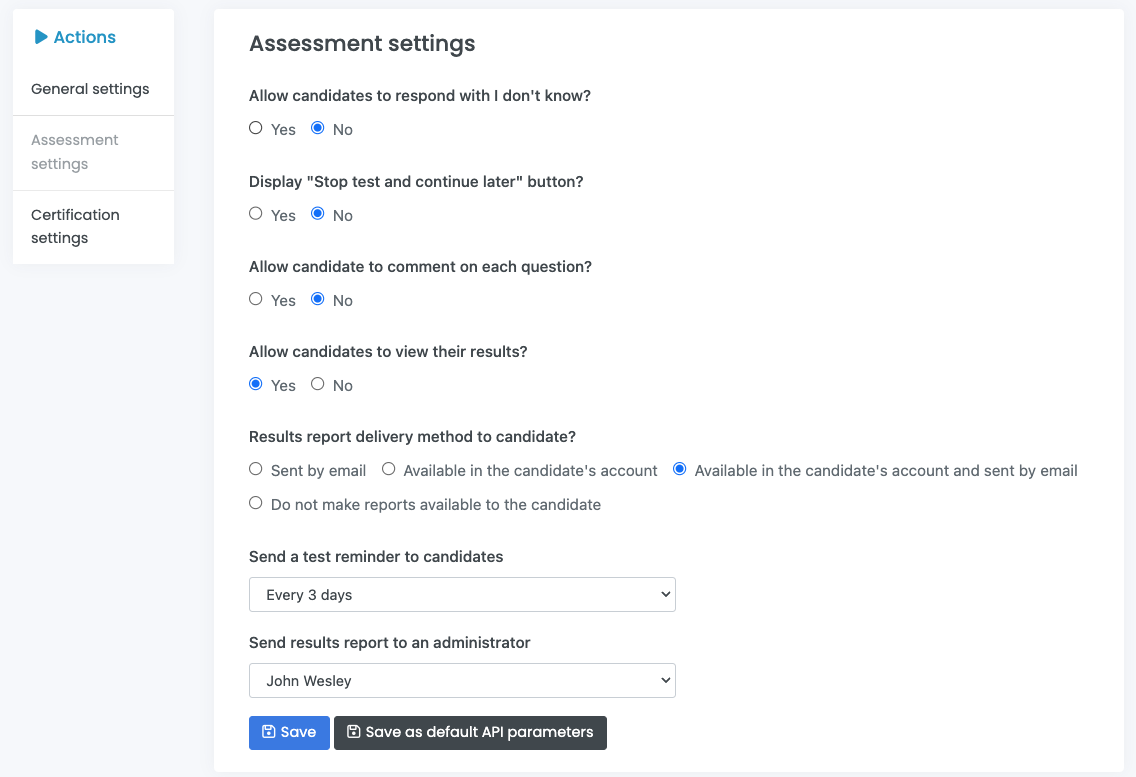
Assessment settings
Set your assessment settings via the Parameters menu, then click on Test options and Assessment settings
-
Allow candidates to respond with “I don’t know”
-
Display a “Stop test and continue later” (pause) button
-
Allow candidates to comment on each question
-
Allow candidates to view their results (at the end of a test)
-
Result report delivery method to candidate
These options can be set at the Account, Group or student (candidate) level.
Once you have customized your settings, click the Save button.
Certification settings
The Certification settings allow you to send the diploma to a student, as well as determine who receives a copy of the certification report including another administrator if you choose to do so. These options can be set at the Account, Group or Candidate level.
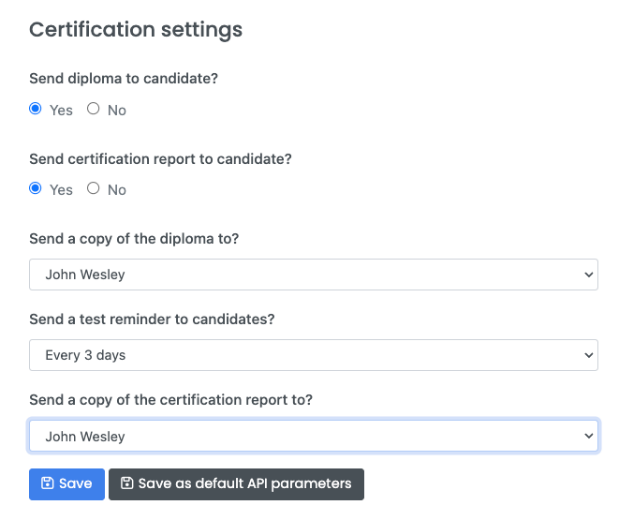
Once you have customized your settings, click the Save button.
Expected Outcomes
Expected Outcomes allow you to set expected outcomes for training/education course outcomes.
You may set the expected levels of proficiency for specific digital skills, that you want your students to attain by a course conclusion for example.
Using Expected Outcomes for training or educational classes allows for pre-course assessment ensuring that individuals are in the right course, and to create learning and development roadmaps. Applying Expect Outcomes to testing enables you to validate if a student has achieved the learning outcomes from the course.
Expected Outcomes can be set on each of the four or five main skill domains that students are assessed on.
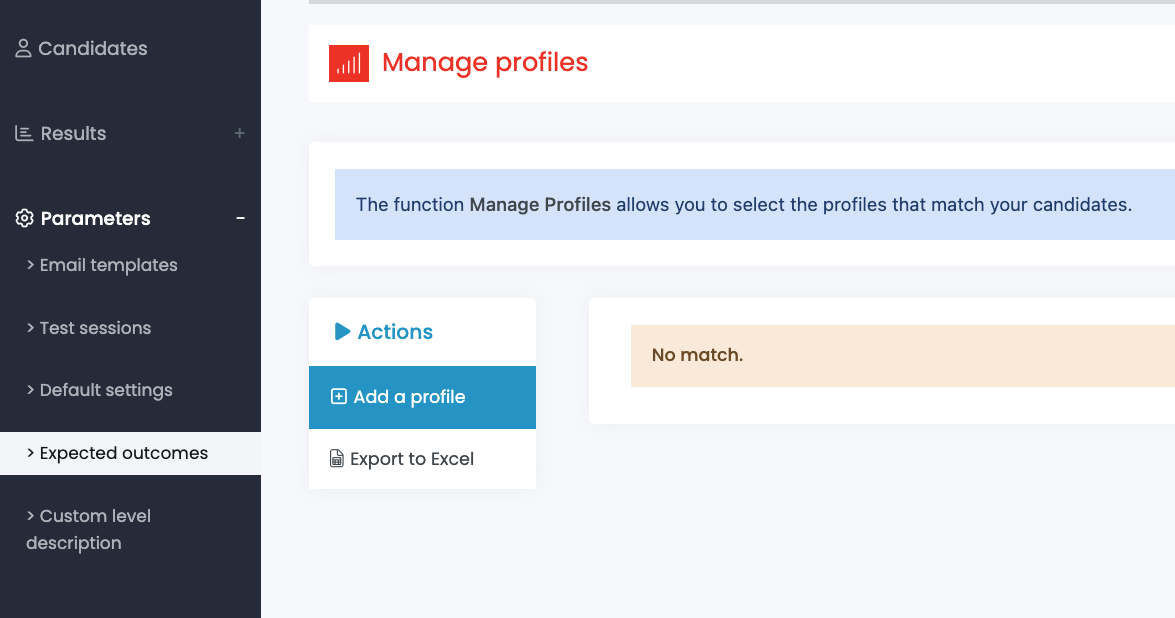
From the main menu select Parameters then page click on Expected outcomes and then click the blue Add a profile button.
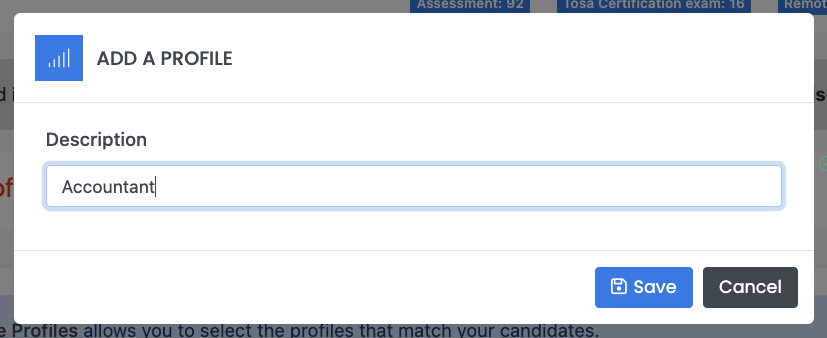
To add a profile, click on the blue Add a profile button.
The Add a profile window opens. Enter the description of the profile in the text field and click Save.
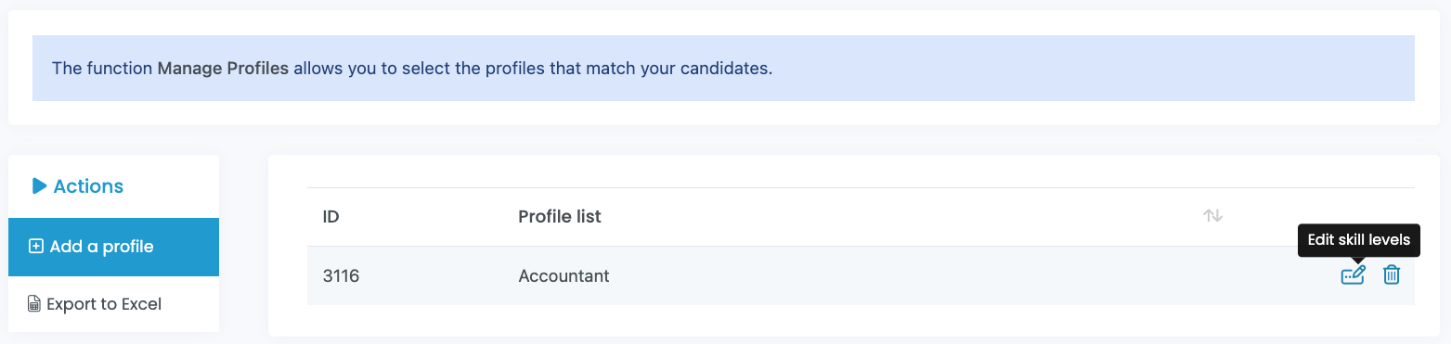
Once done, click on the Edit skill levels icon to open the Manage jobs skills page.
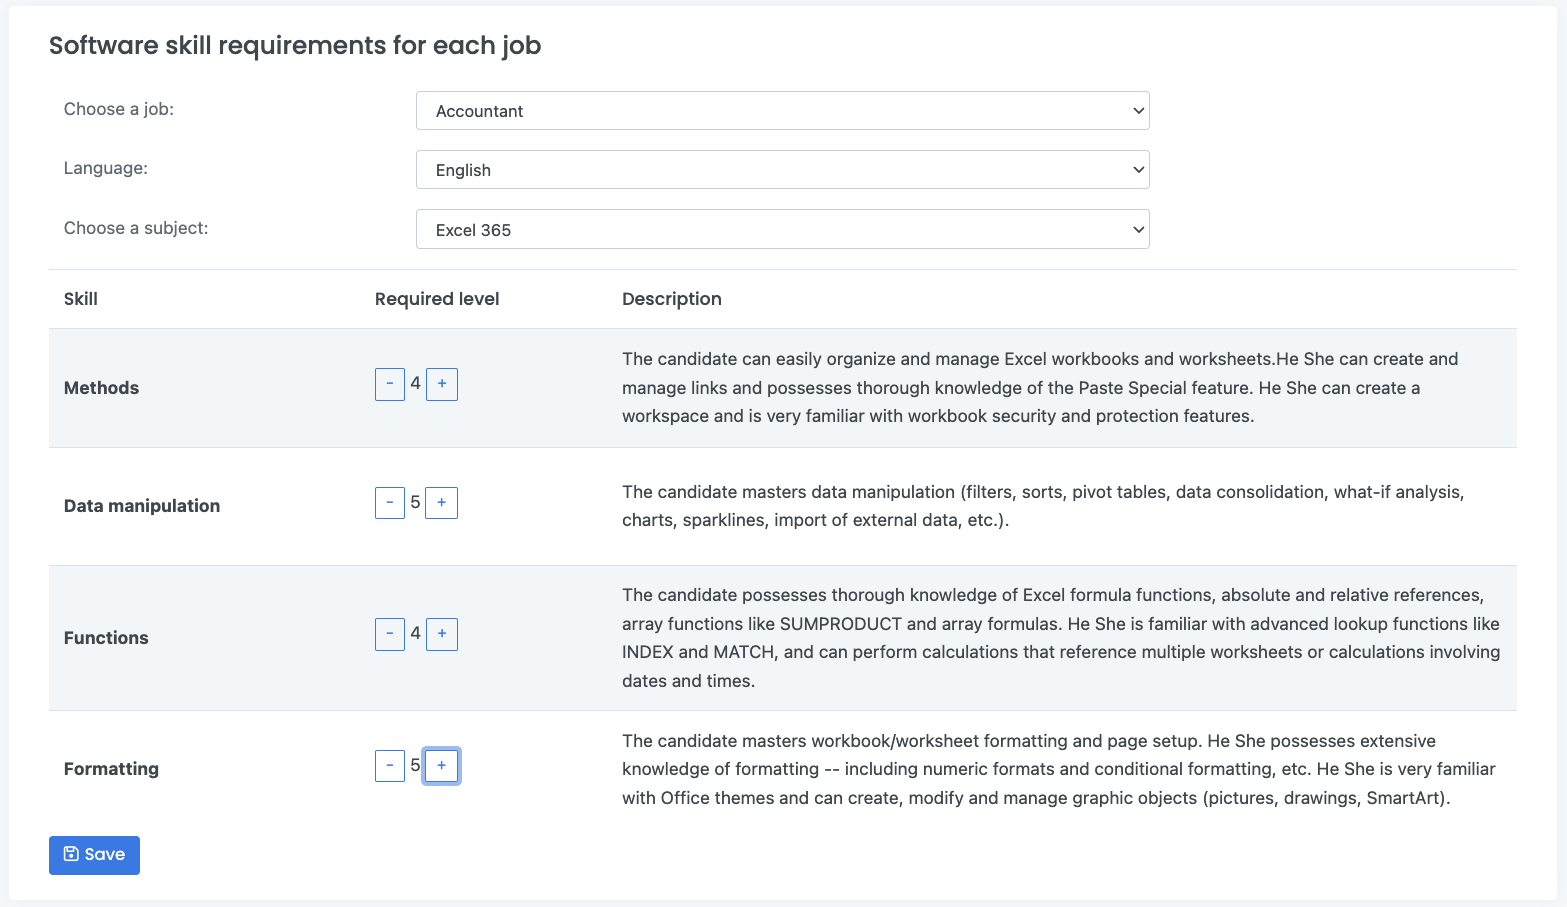
Select the expected outcome/role, language, software or digital skill.
Use the Plus (+) or Minus (-) buttons to modify the requirement level of each one of the main skills of the chosen subject. Then, click Save to confirm your changes.
The numerical level coorelates with the levels outlined in the Skills Framework for your chosen application/exam.
Custom level description
You can modify the level description on each assessment test, according to the test subject family.
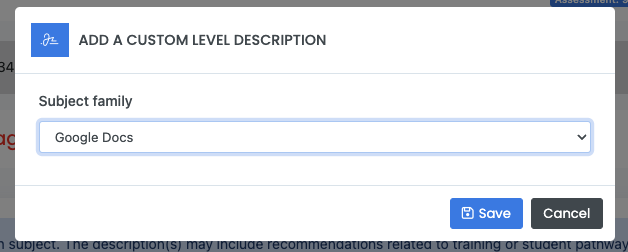
To access this feature, select the Parameters menu, click on Custom level description, and click on the red Create level description button.
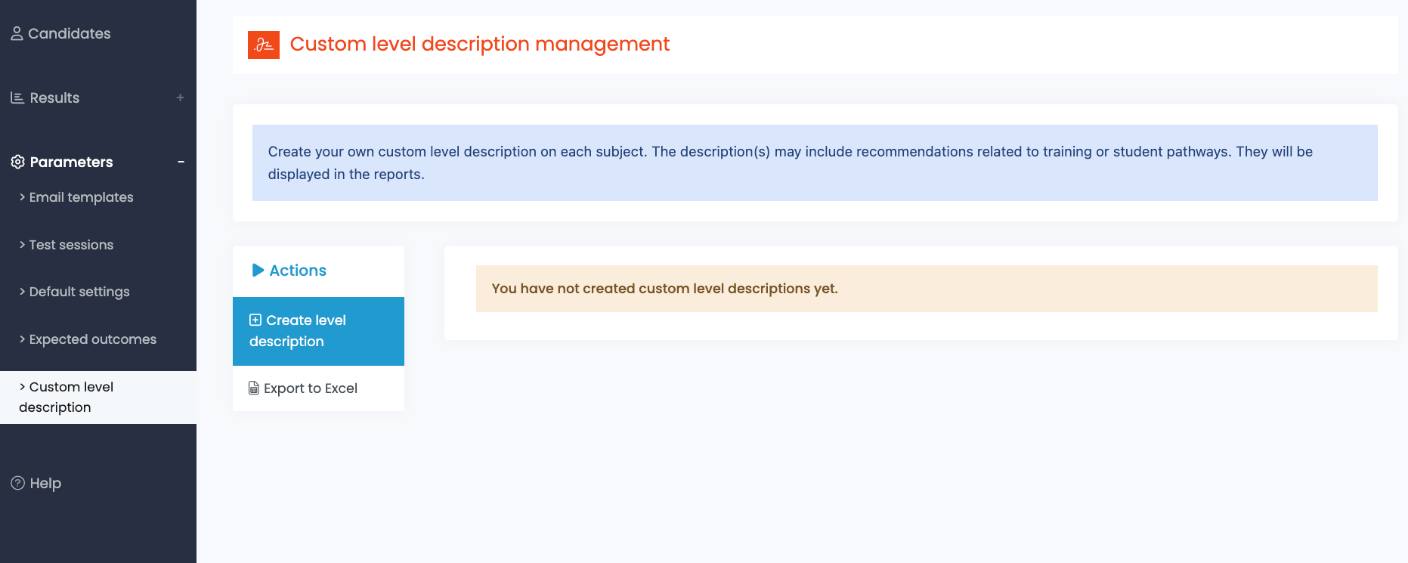
In the Add A Custom Level Description window select the software family and then click Save.
In the Custom Level Description Management window, you can input specific messaging for each level of proficiency. This is helpful in mapping outcomes to job placement or a learning and development roadmap.
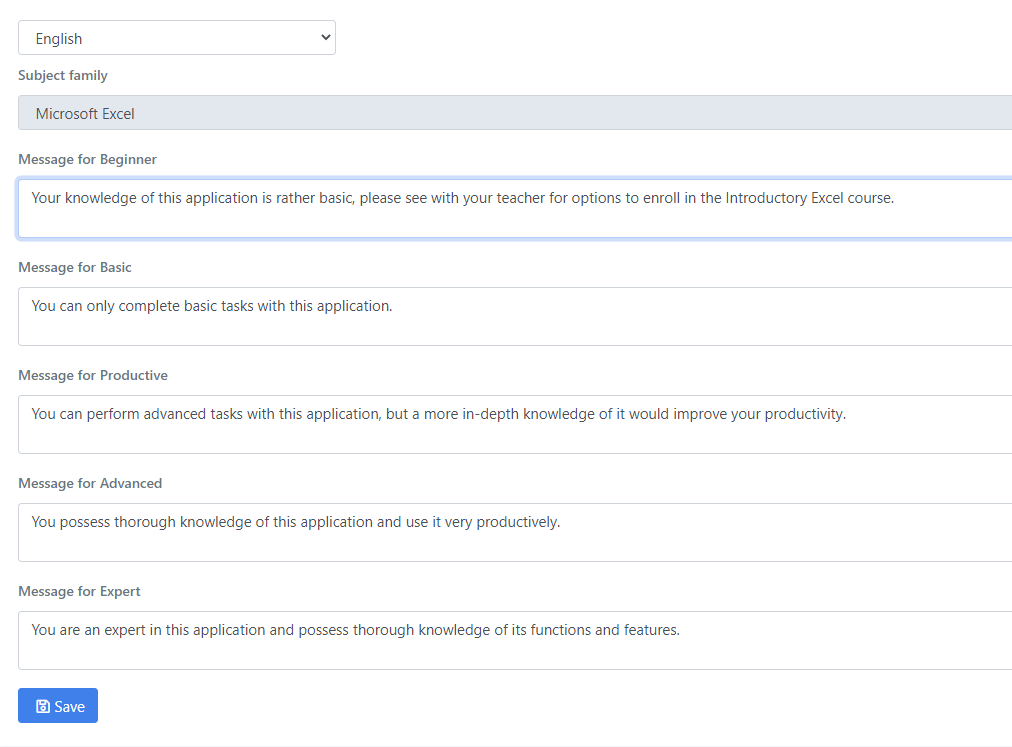
Once you have completed the messages for each level, click Save. These comments will appear on student reports, based on the student’s level of proficiency.
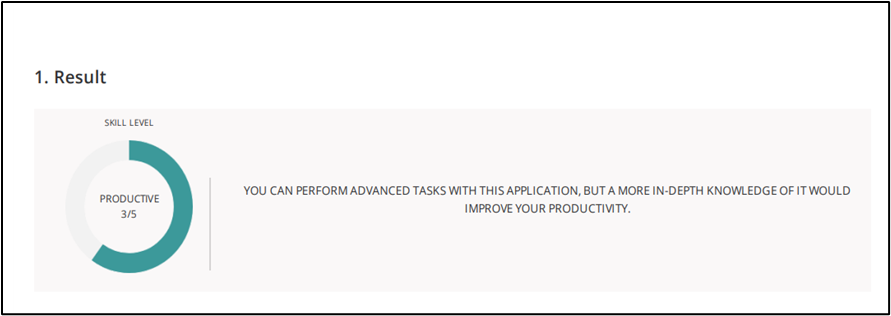
Here is an example of a Custom Level Description on a student’s assessment
Managing candidates
Groups
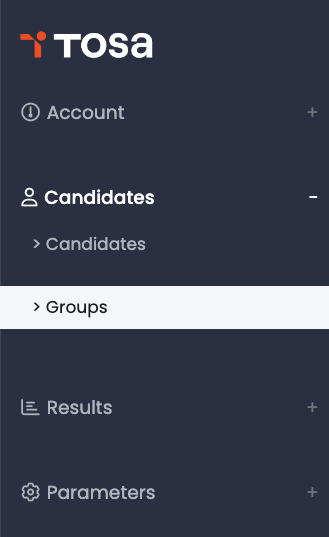
Create groups of students. Each student can belong to one or more groups.
Note: the default Main group cannot be deleted.
The Groups Menu helps you organize your students. It also allows you to register students in bulk and generate various reports.
There are three levels of groups: Level 1 are main groups; level 2 are subgroups and level 3 are subgroups to the level 2 subgroups.
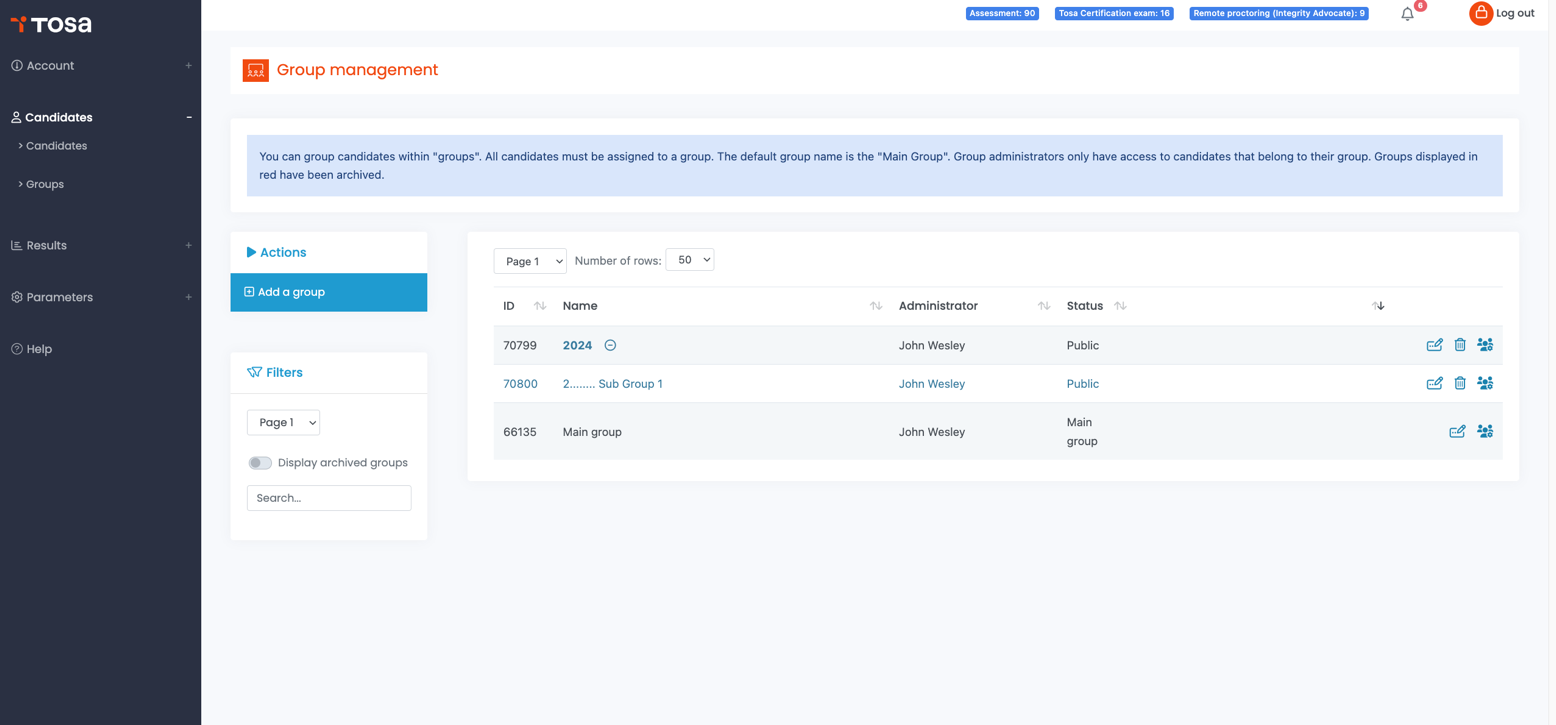
Adding a new group
New main group (level 1):
-
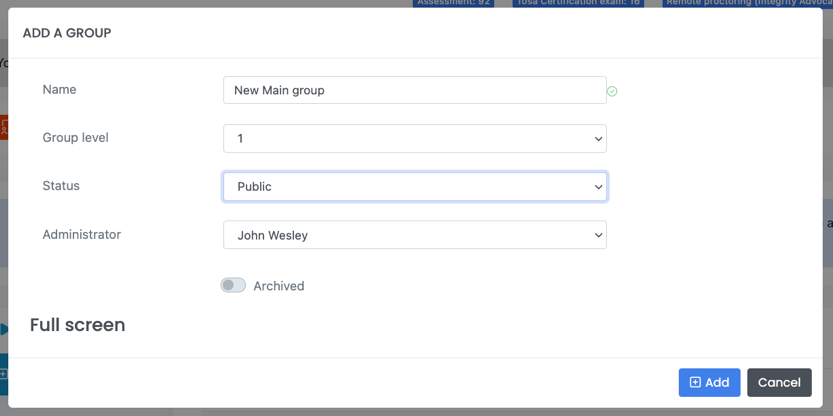
Click on the Add a group button on the Group management page.
-
The ADD A GROUP box will open.
-
Fill in the group’s name
-
If a group is set as Public, all administrators have access to it.
-
If a group is set to Private, only the group’s administrator along with all account administrators will have access to it.
-
Choose the Group level “1” as it is a main group.
-
Choose the group’s administrator.
-
Click on the Add button.
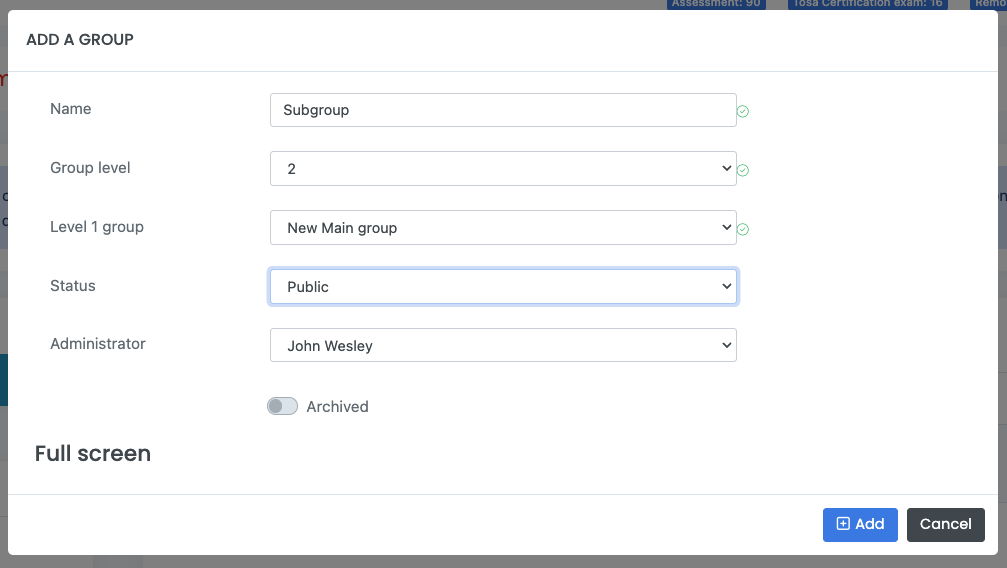
New subgroup (level 2 or 3):
-
Click on the Add a group button on the Group management page.
-
The ADD A GROUP box will open.
-
Fill in the group’s name.
-
If a group is set as Public, all administrators have access to it.
-
If a group is set to Private, only the group’s administrator along with all account administrators will have access to it.
-
Choose the Group level “2” or “3” as it is a subgroup.
-
Choose the level 1 (and 2 if you are creating a level 3 group) group that your group will be a subgroup of.
-
Choose the group’s administrator.
-
Click on the Add button.
Editing groups
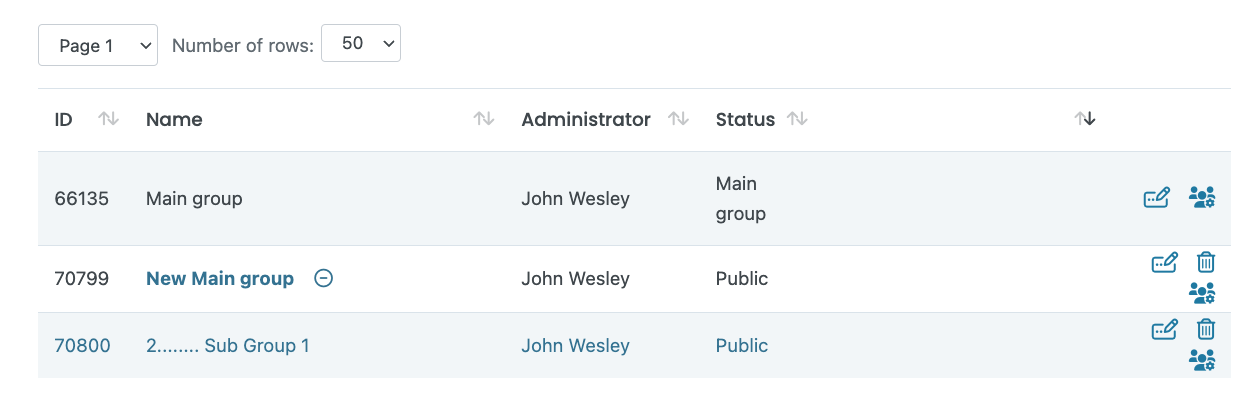
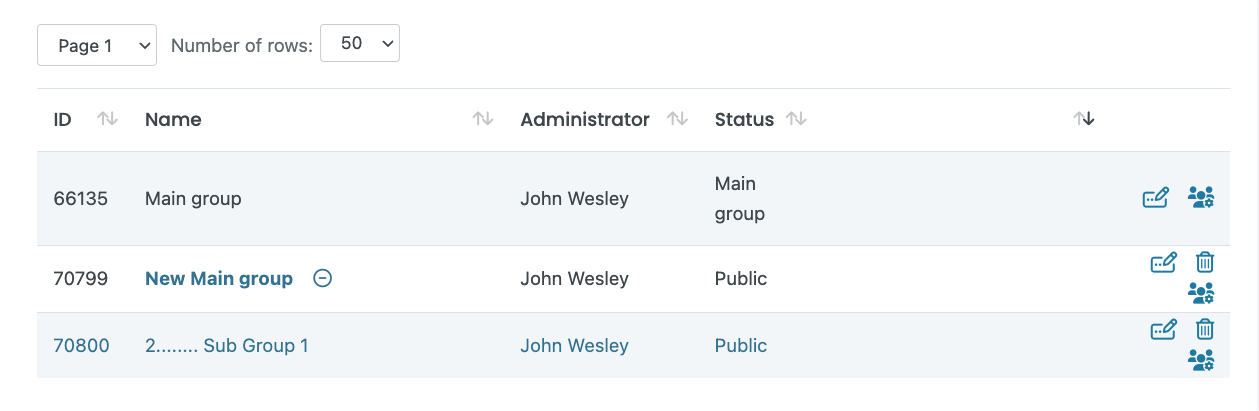 From the Group management page, drag your cursor over the group of your choice to show the Edit and Delete icons.
Clicking on the Delete icon permanently deletes a group. When a group is deleted, all of its students are sent to the default Main group.
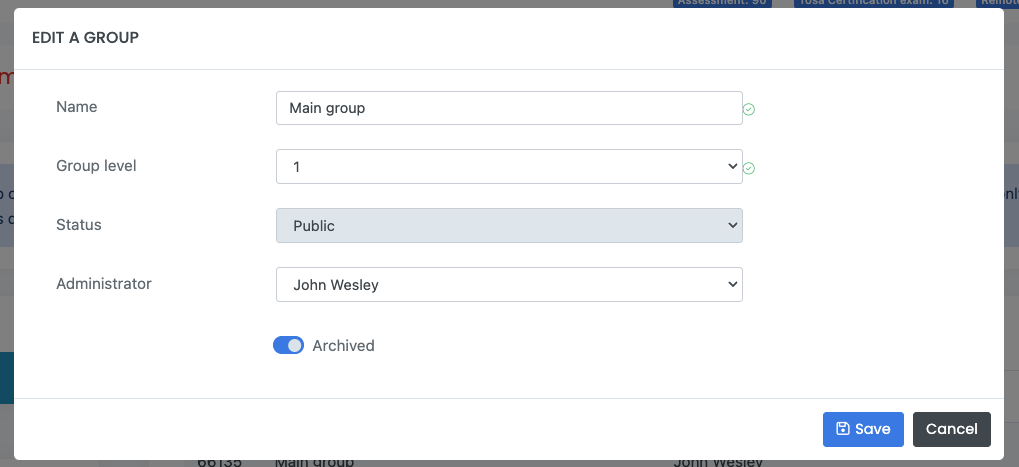
Clicking Edit allows you to modify the name and the status of the group, as well as archive it. Archiving a group will hide it from the Group Management page. This is recommended for old groups that are no longer relevant. It will allow you to avoid deleting the groups.

Toggle the Display archived groups switch in the Group Management page to make the archived groups visible (in red).
Adding or removing student(s) (candidates) from a group:
Still from the Group Menu, it is possible to add or remove students from a group.
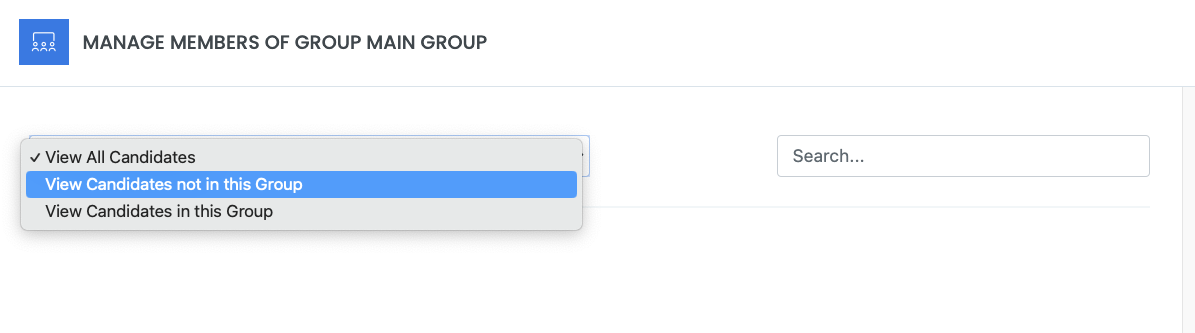
Click on the “Add / Remove candidate from this group” icon
From the scroll-down menu, you will be able to search a student from the group (View Candidates in this Group) or outside of it (View Candidates not in this Group). Add or remove the chosen student with the + or – buttons.
Use the text field to perform a specific student search.
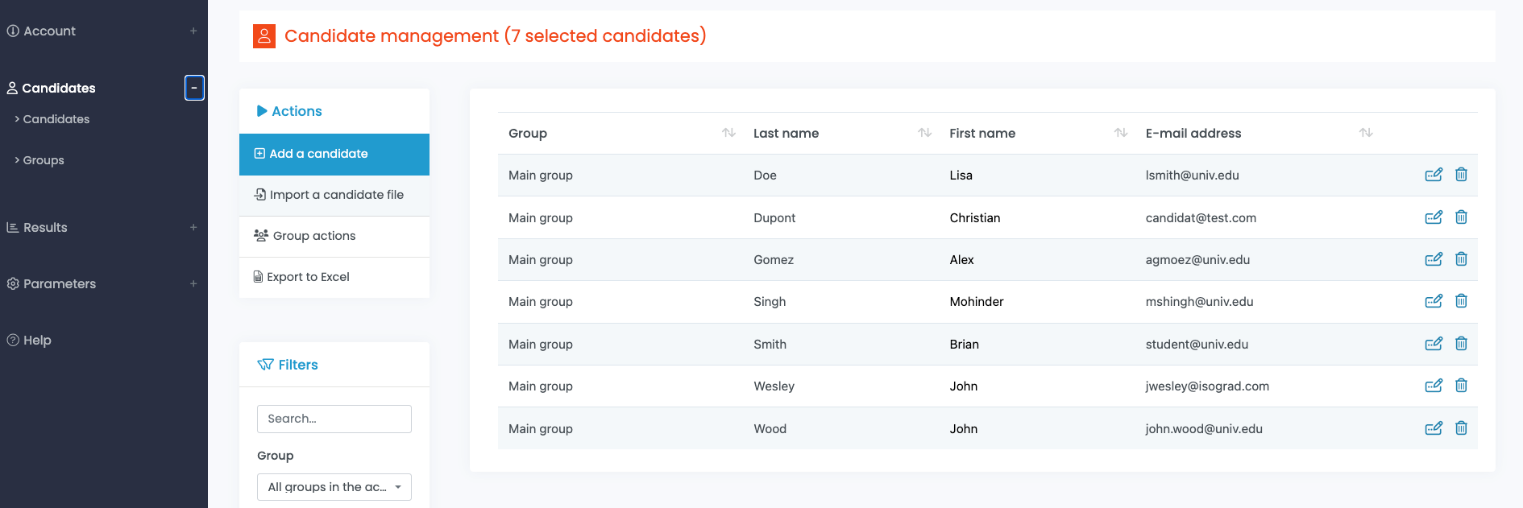
Adding candidates
Now that you have all of your testing parameters set, it is time to start adding students. There are two options to add students to the platform: multiple students can be bulk loaded, or added individually.
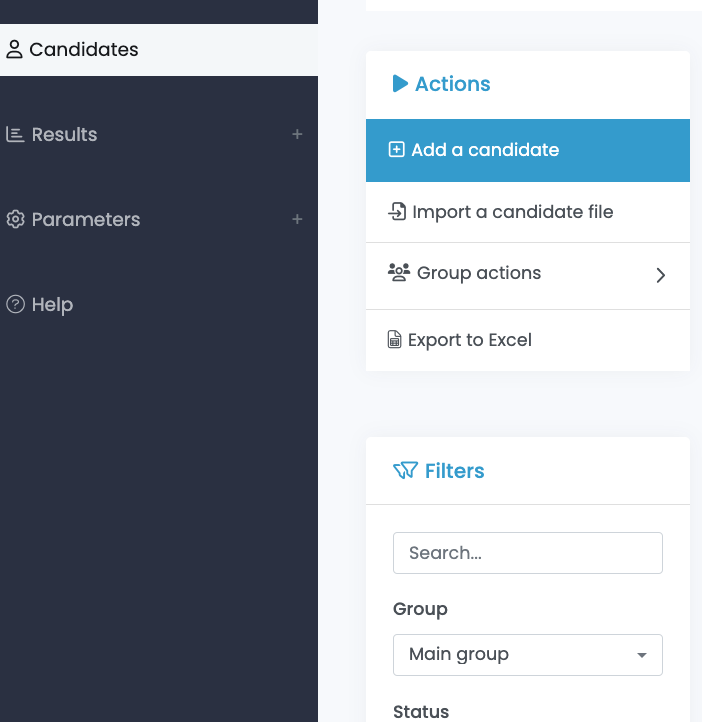
To start the process for either bulk or individual students you need to select Candidates from the main menu.
Adding multiple candidates at once
Importing an Excel file that contains your students’ details allows you to quickly upload up to 500 students at one time for a defined group.
Click on Import a candidate file.
In the Add Multiple Candidates window do the following:
-
Click Download Excel file template and download the Excel file to your computer.
-
In the downloaded Excel file: Input the following mandatory fields: your students’ Last Name, First Name, Gender (Mrs., Mr., or Not Provided), Language, and E-mail into the Excel template. You can add the optional following fields: student External ID, Status and Password (if you need to create a different password than the one automatically assigned by the system). Save the Excel file onto your computer.
-
Under File to import, click Choose File and navigate to the location of your saved file and select it. You should now see the name of the file you have imported.
-
Under Select a group, chose the correct group(s) or/and subgroup(s) from the dropdown menu.
-
Once you have the correct group(s) selected, click the right-facing arrow. This will move the selected group into the Candidate’s group(s) box.
-
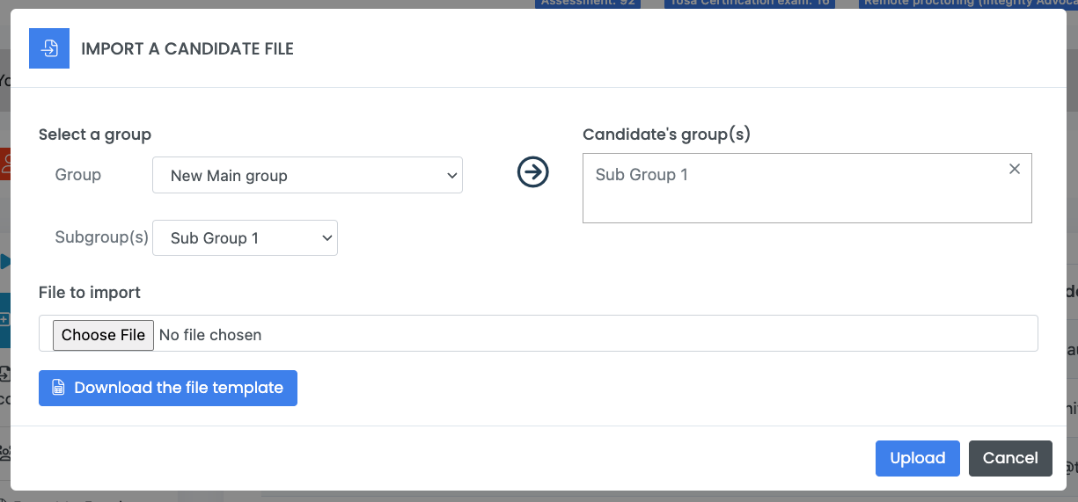

Now click Upload
Adding a single candidate
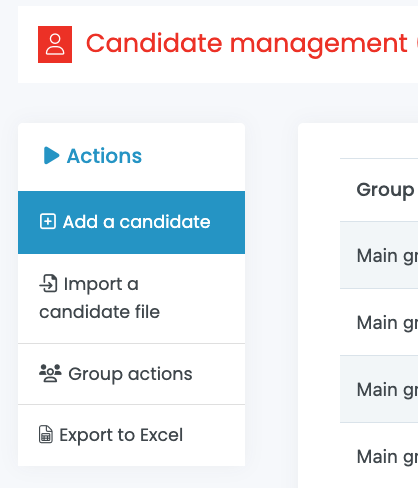
To add a single student, click on Add a candidate.
Fill in the required information
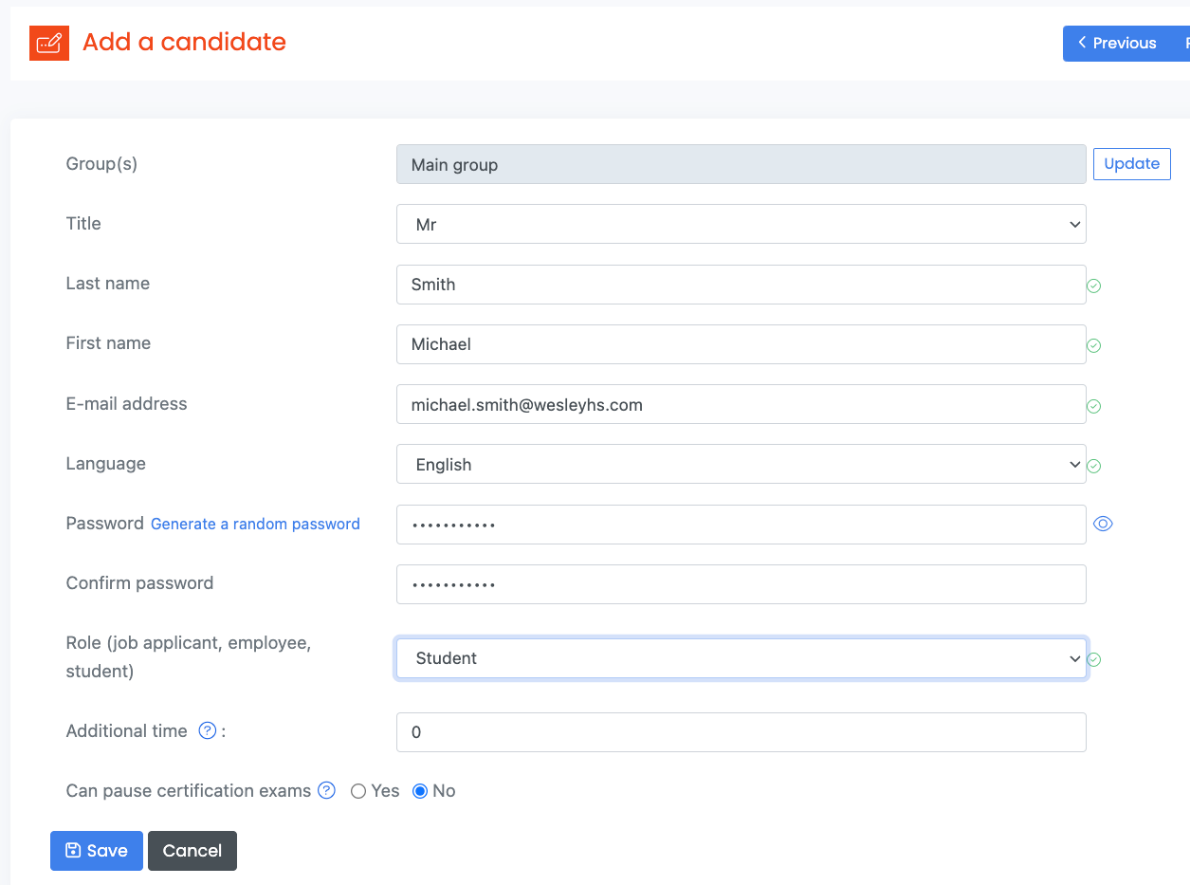
Fill in the required information in the Add a candidate form.
Each student must belong to at least one group (default is Main group) and they may belong to several groups as well.
The student’s login will be their email address, and as such, two students cannot use the same email address.
A student’s password can be generated by the platform, or you can choose a custom password. Once you have completed the form click Save to submit. In all the cases, the students must choose their own password when they connect for the first time.
If needed, you can add extra time for a chosen student. The Additional time value is in a percentage of the standard test time.
In certain cases, you can allow your students to pause their certification exams. This is only available for certification exams taken in-house, and for students who require it (students with exceptionality).
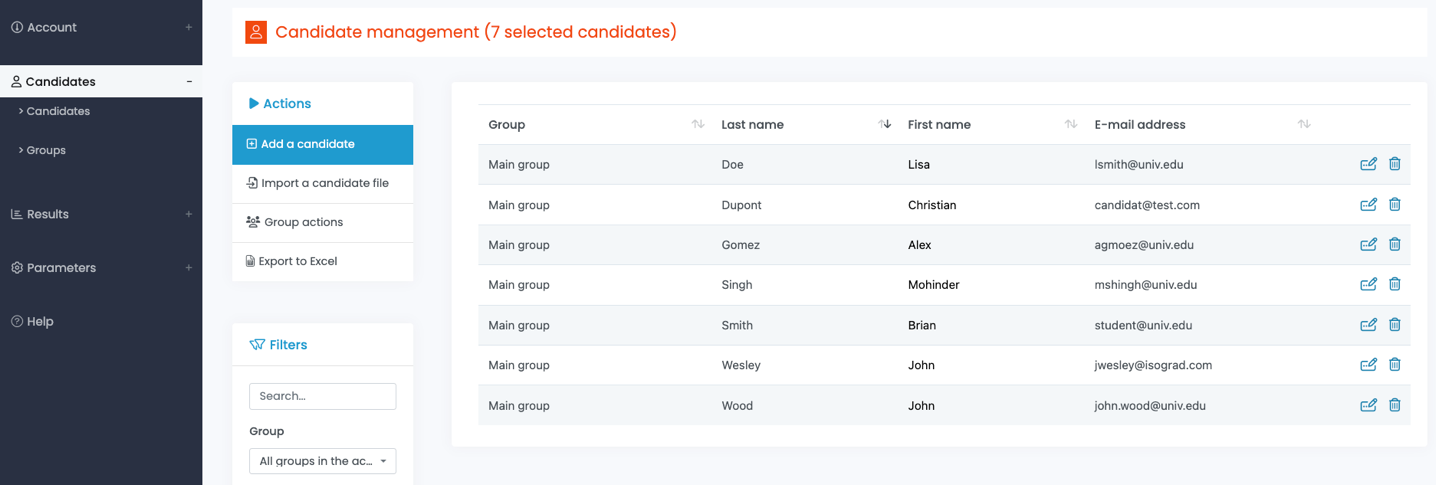
Registering candidate(s) to a test
To register students to a test, click on Candidates on the main menu.
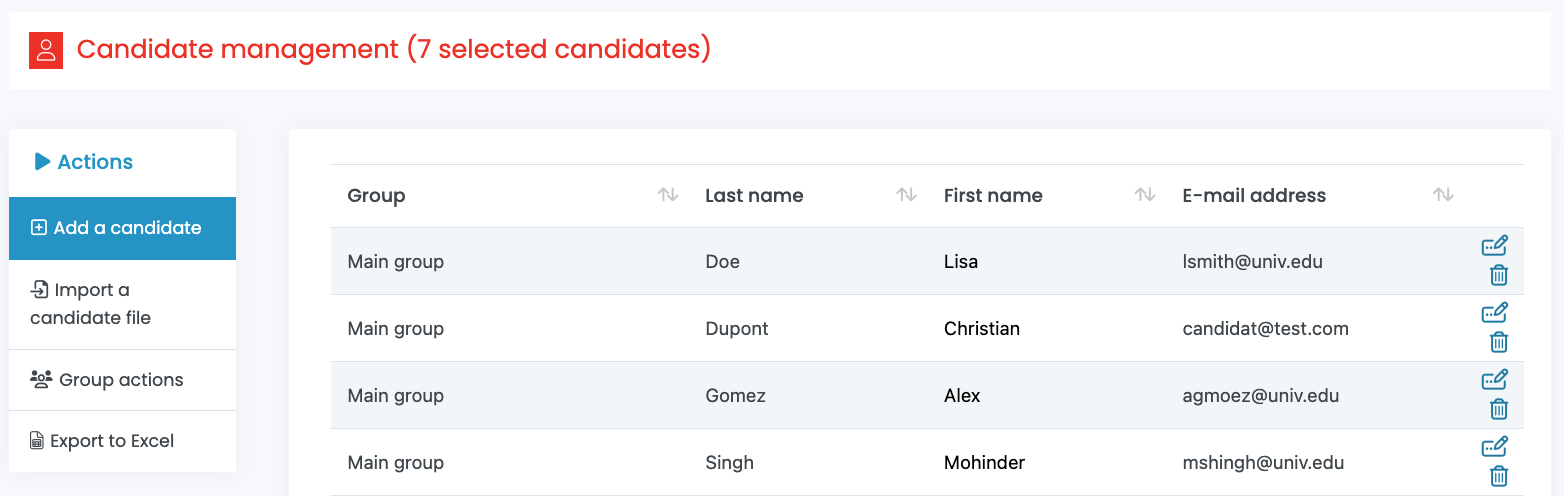
To the right of the student’s email address, click on the Edit icon.
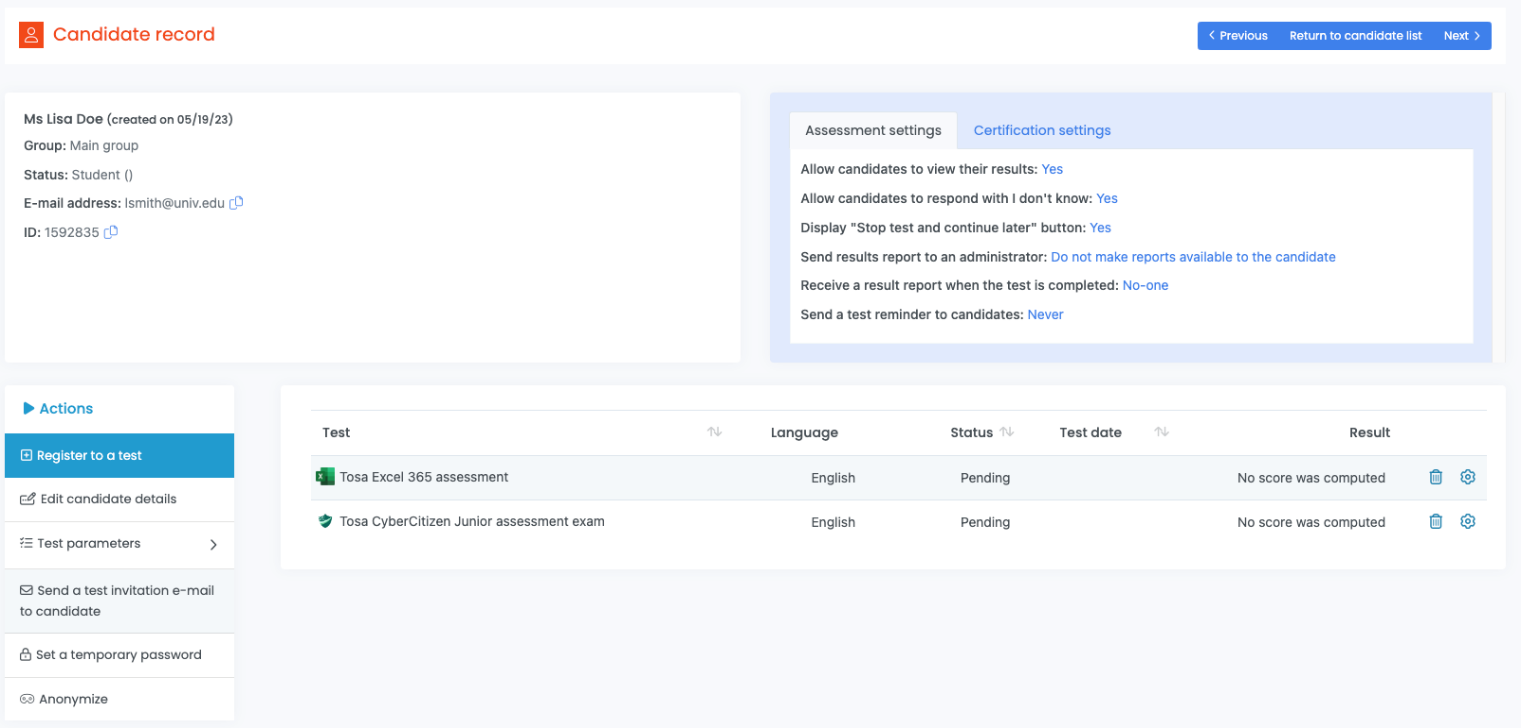
The student record page will display. If the student has taken a test or has pending tests they will appear here. You will also be redirected to this page after creating a student.
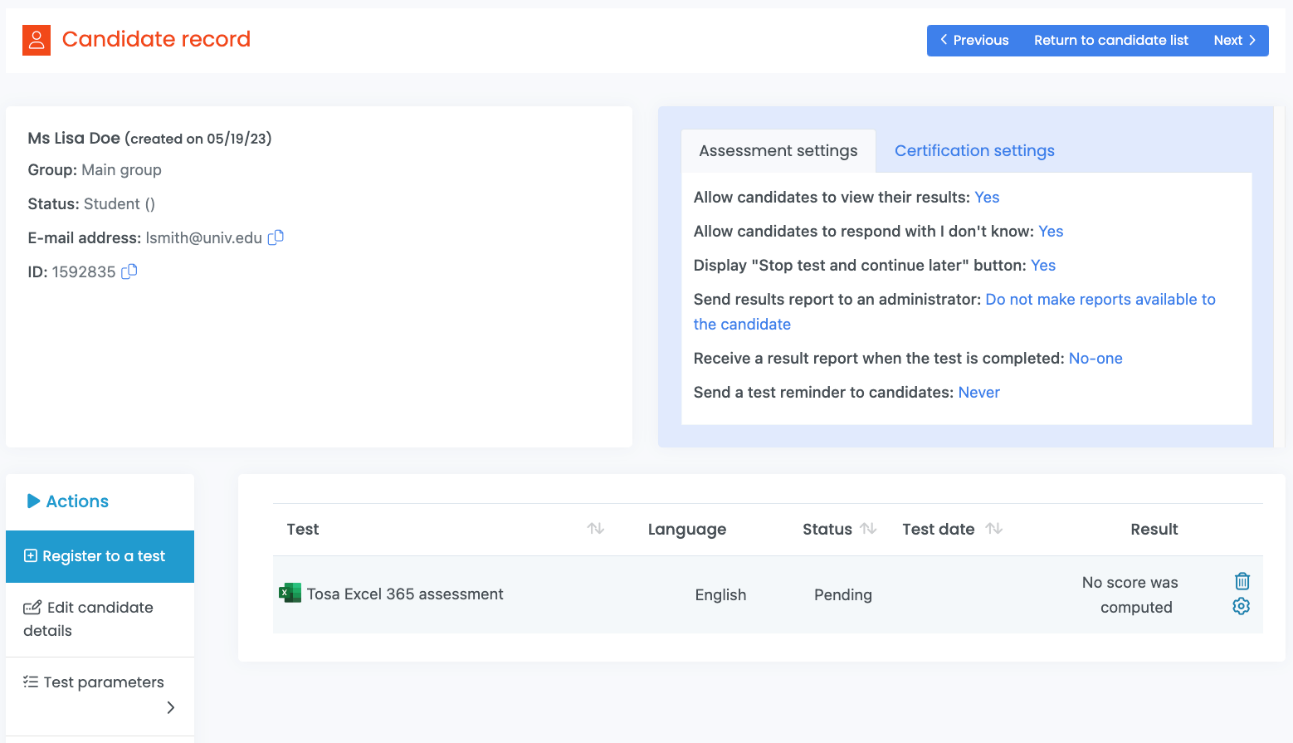
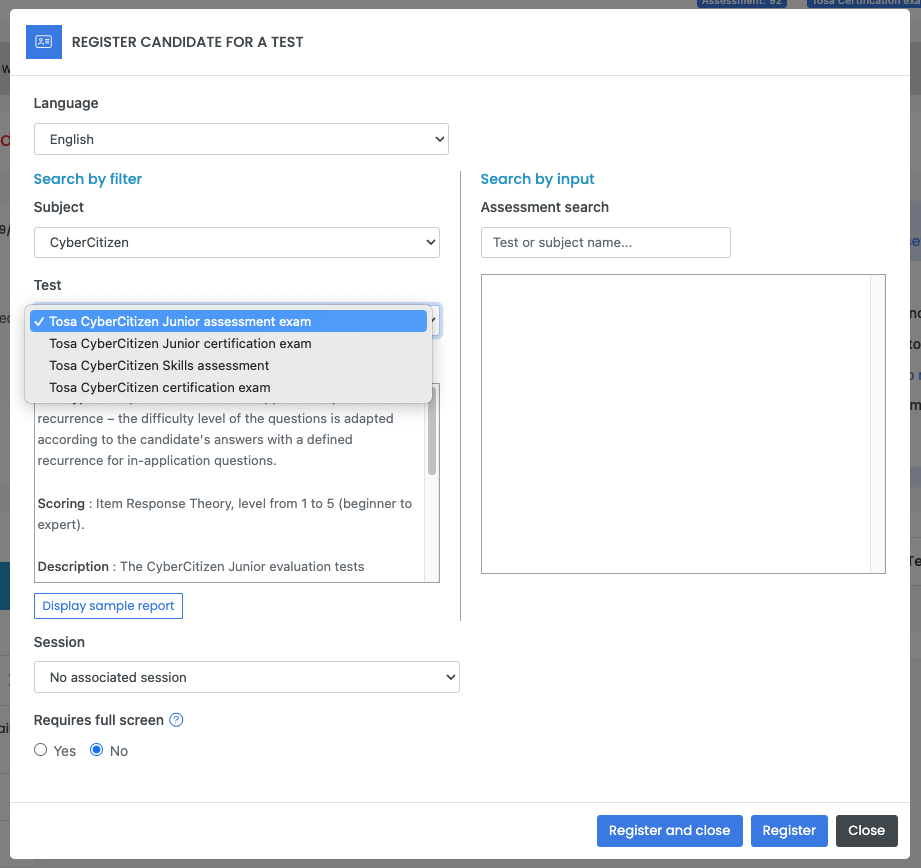
Click on Register to a test and choose the following:
1) Language of the test
2) Subject (Excel, Word, Google Docs…)
3) Test version and type (assessment, certification…)
4) Session (if applicable)
A test session is a specific date and time range when your students will be able to log into the platform to take their test.
5) Requires Full Screen
Use this option if you want to make sure your student remains in full screen mode until completion of the test.
You will be able to search for a particular test by using the Search by input field.
Click Register if you are registering a student for multiple tests, then continue to register for any additional tests. Click Register and close if you want to assign a single test to a student.
If the wrong test is assigned to a student or a group of students, or if there is a need to delete a test that has not been started (Pending) the administrator can perform such task.
To delete a pending test, click the Delete icon and the test will be automatically deleted.

If you delete a pending test, the test credit is automatically returned to your account.
Sending an individual test invitation
Once a test or multiple tests have been assigned to an individual student, a test invitation email must be sent out.
Start by selecting Candidates from the main menu. Then choose your student in the list or by inputting their name or email address in the Search field of the Filters.
Click on the Edit icon.
Once you have added a test, click on Send a test invitation e-mail to candidate.
The Message Details window opens. Edit your email subject, choose your email template, sender email address (if you have entered one). You can send a copy of the sending to another administrator or to yourself.
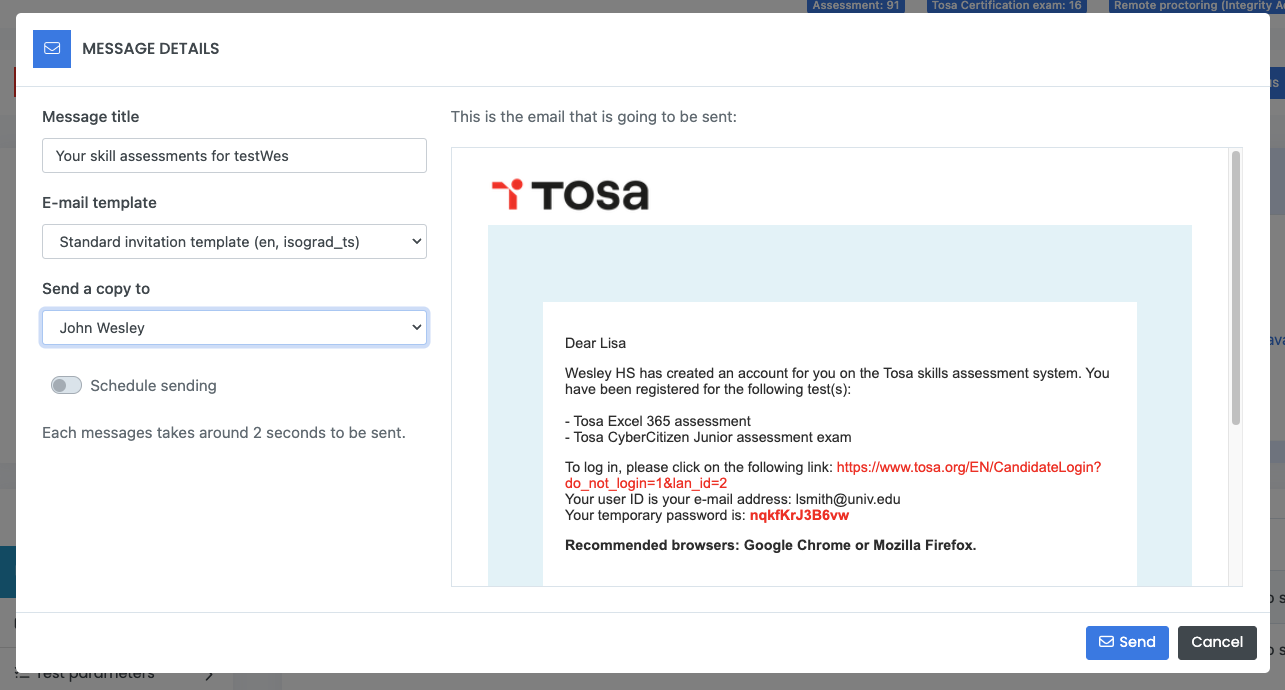
You can schedule the sending of the email if you need the email to be sent at a later date.
Once you click Send, the invitation email is sent, and the student can access the test(s).
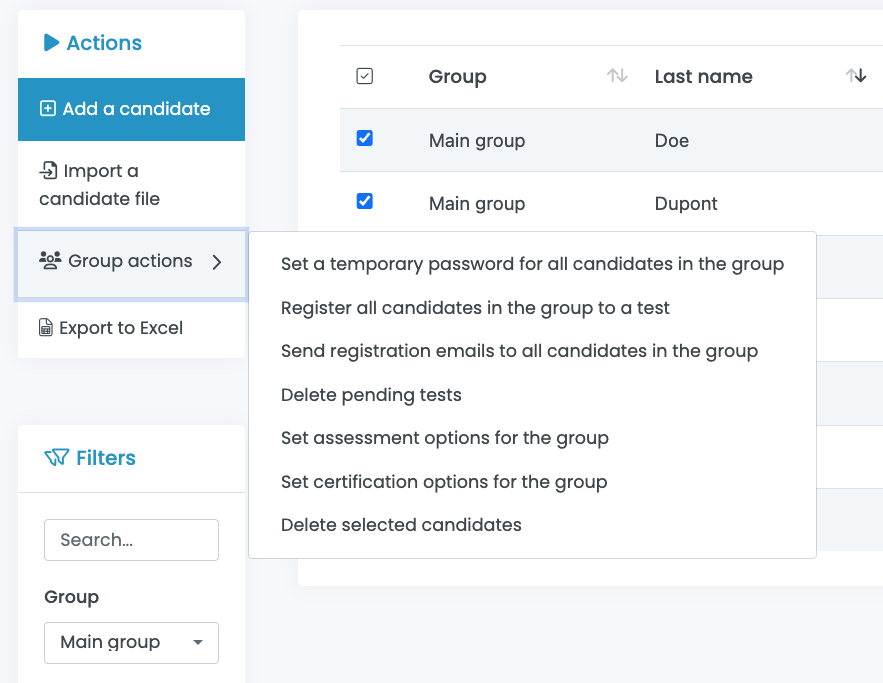
Group actions
In order to activate the Group Actions button, you will have to select a group or sub-group, then you will see a small arrow appearing in the button.
Group Actions allow you to perform tasks for all the students from a specific group. The tasks that can be performed include:
-
Setting temporary passwords for the entire group
-
Registering a group for the same test
-
Ability to send registration emails
-
Delete pending tests (the credits will be added back to your credit bank)
-
Setting and defining assessment options for the group
-
Setting certification options for the group
-
Deleting multiple students
The two main tasks performed at the group level are registering the group for a test and sending registration emails.
Registering all candidates in a group to a test
Use the Register all candidates in the group to a test option to save time and ensure that all students in the selected group are assigned to the same test(s).
Access the Register all candidates in the group to a test option by selecting Candidates from the main menu, then choose your group and select Group actions.
The Register Candidates to a Test window will open. You will then select the language, the subject, the test, and the session. Then click on Register or Register and close.
Click on Register to a test and choose the following:
1) Language of the test
2) Subject (Excel, Word, Google Docs…)
3) Test version and type (assessment, certification…)
4) Session (if applicable): A test session is a specific date and time range when your students will be able to log into the platform to take their test.
5) Requires Full Screen: Use this option if you want to make sure your student remains in full screen mode until completion of their assessment(s).
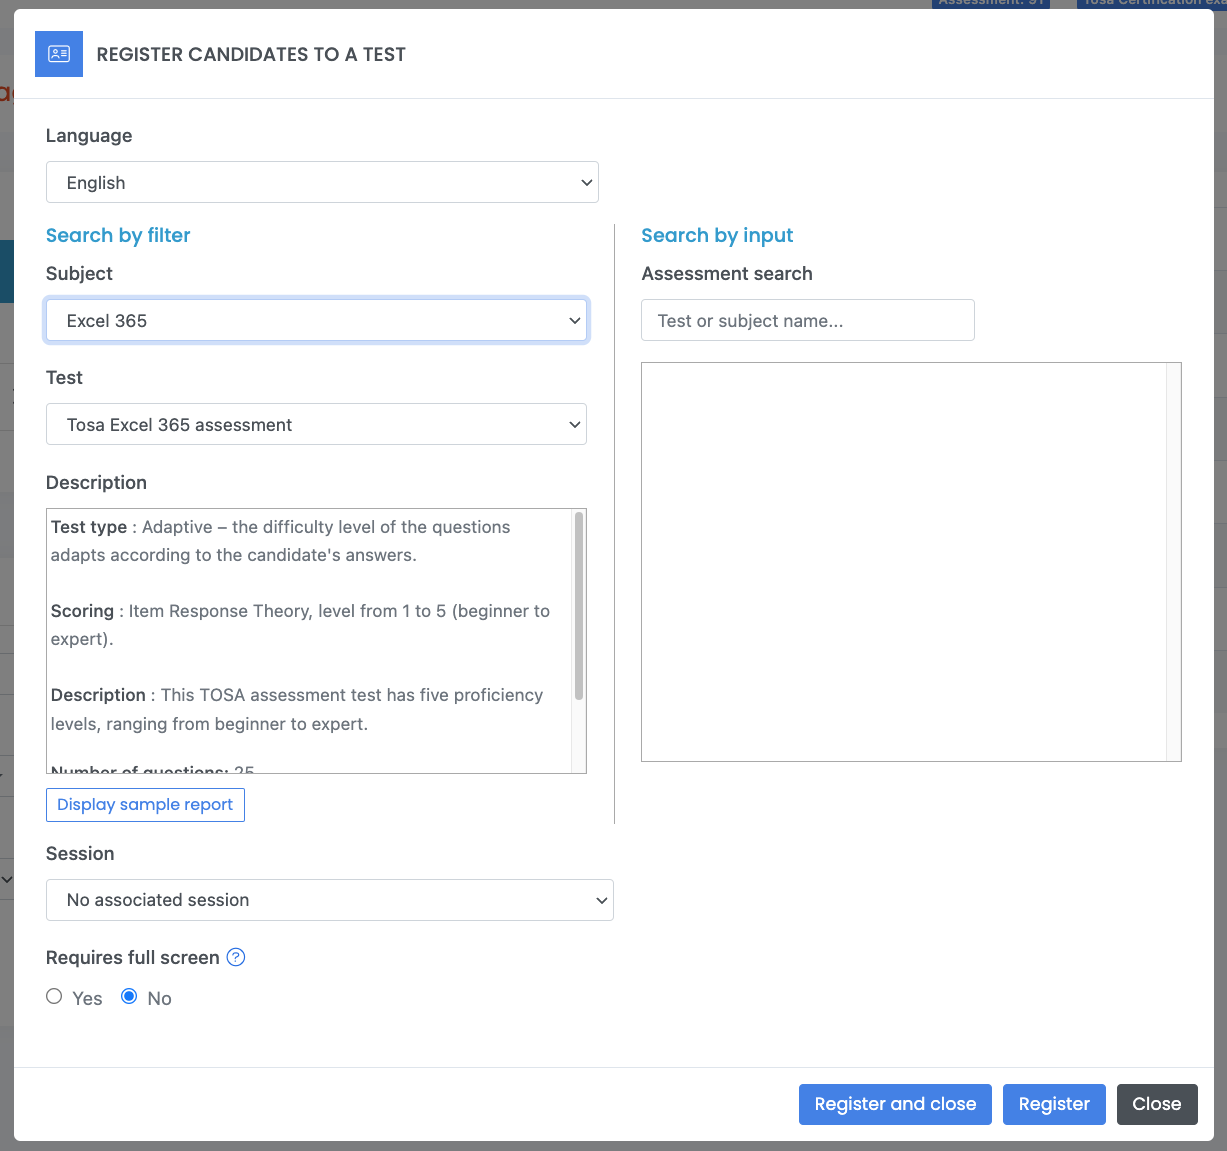
You will also be able to search for a test using keywords by using the Search by input field.
Click Register if you are registering a student for multiple tests, then continue to register for any additional tests. Click Register and close if you want to assign a single test to a student.
Sending an invitation email to a group
Once you have assigned a test to a group, it’s time to send an invitation email. Assuming all members of the group will be taking the same test(s), you can use Send registration emails to all candidates in the group.
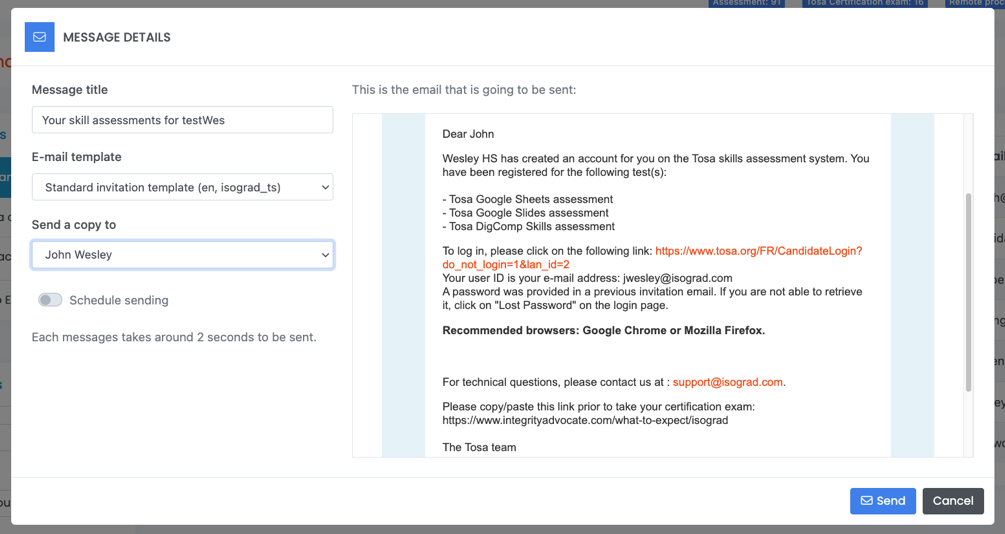
The Message Details window opens. Edit your email subject, choose your email template, sender email address (if you have entered one). You can send a copy of the email to another administrator or to yourself. When you are ready, click Send.
Once you click send, the invitation email will be sent to each student, providing them the link, their credentials and the test(s) that you have assigned them.
If you do not want to send your invitation email to your group right away, you can have the system send it at a later date by selecting Schedule sending.
Other group actions
Group actions also allow you to:
(1) Set a temporary password for all candidates in the group. This will allow you to set a unique password that all students can use to log into the platform. Once logged into their account for the first time, the students will have to create their own password.
(2) Delete non started tests. If you delete the groups’ pending tests, all credits will be returned to your credit bank.
(3) Set assessment/certification options for group candidates. Allows you to customize the assessment/certification options for a defined group.
(4) Delete Selected candidates. Choose this option if you want to delete the groups’ selected students.
Managing results
Results
The platform provides you with full insight into the tests’ results.
Results are available for both individuals and groups.
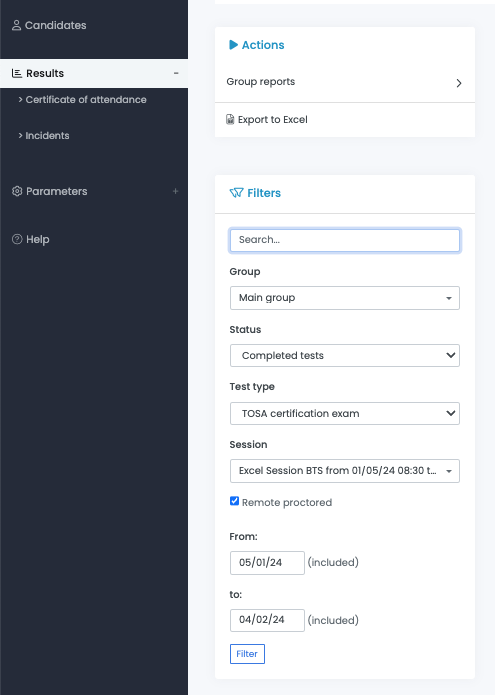
To access the results data, Click on Results in the main menu. You can search within the data and filter by:
(1) Group/subgroup
(2) Test status (All, completed, pending, grade pending, started)
(3) Test type (assessments or certifications)
(4) Session
(5) Remote proctored or not
(6) Date range
Click Filter to validate your choices.
All results can be exported into an Excel file.
Individual Results

To review a specific student’s results:
Form the Results menu, input their name or email into the search field.
 Once the student’s results have loaded, click on the Analysis icon.
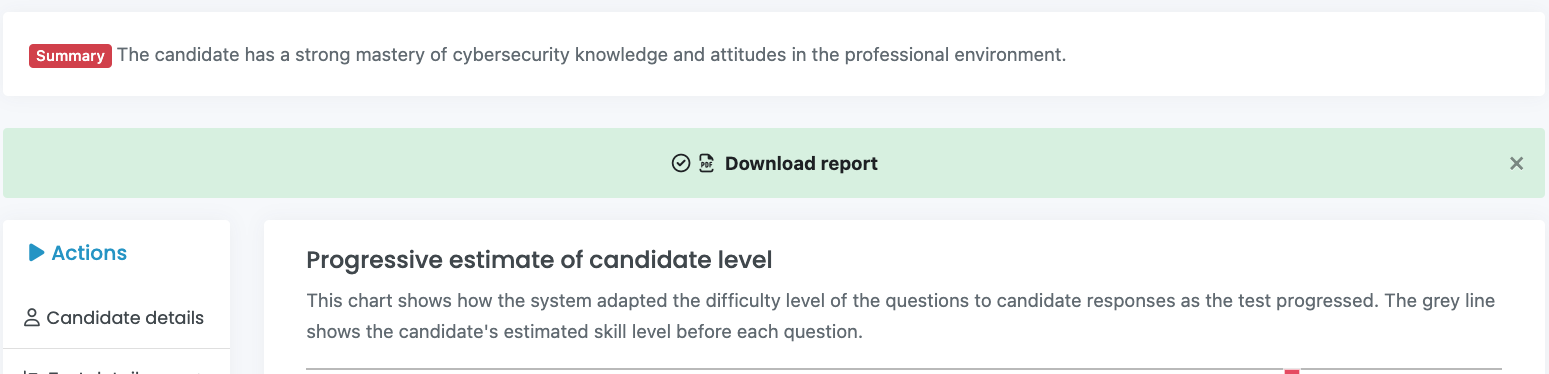
The Test analysis screen will open, showing student’s skill level and summary
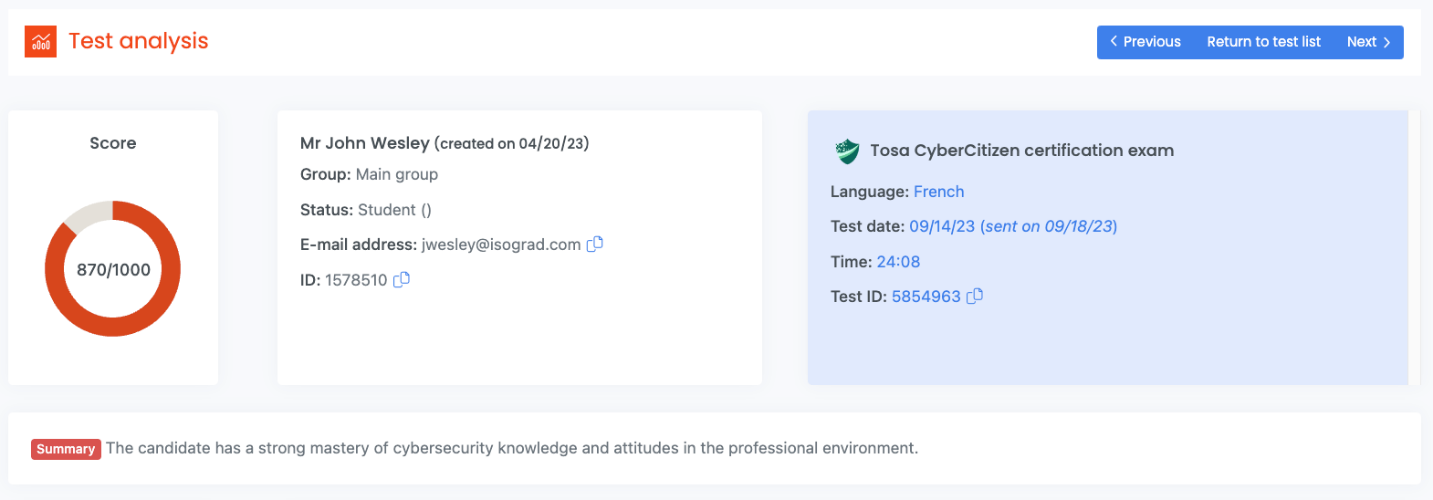
For deeper insight and analysis, click on Test details and a scroll down menu will appear with the following options:
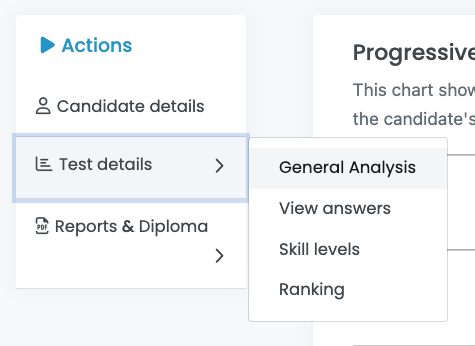
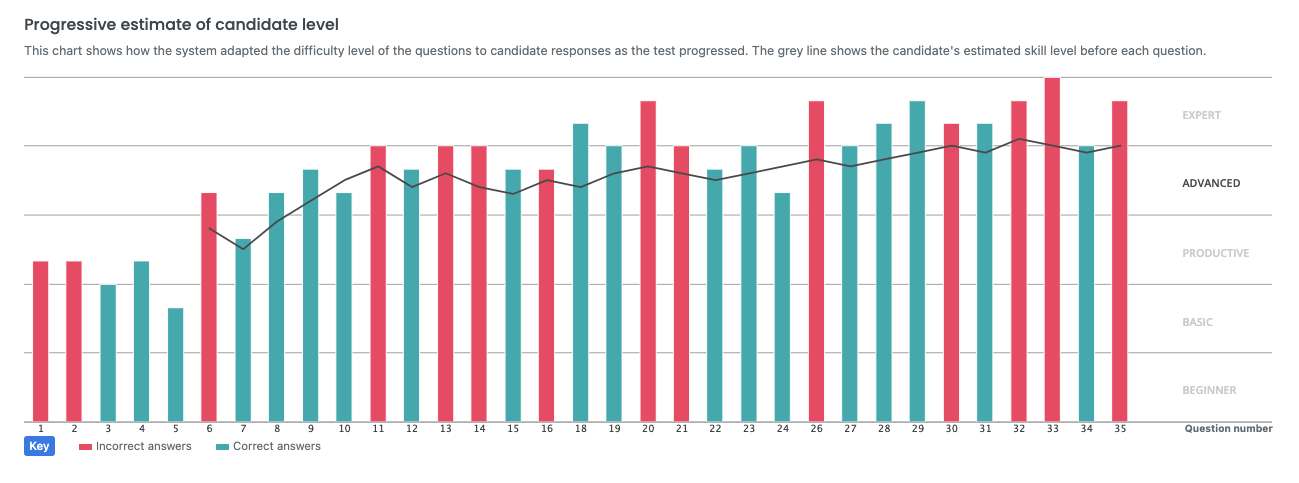
1) General analysis: See the test’s questions difficulty level in a chart.
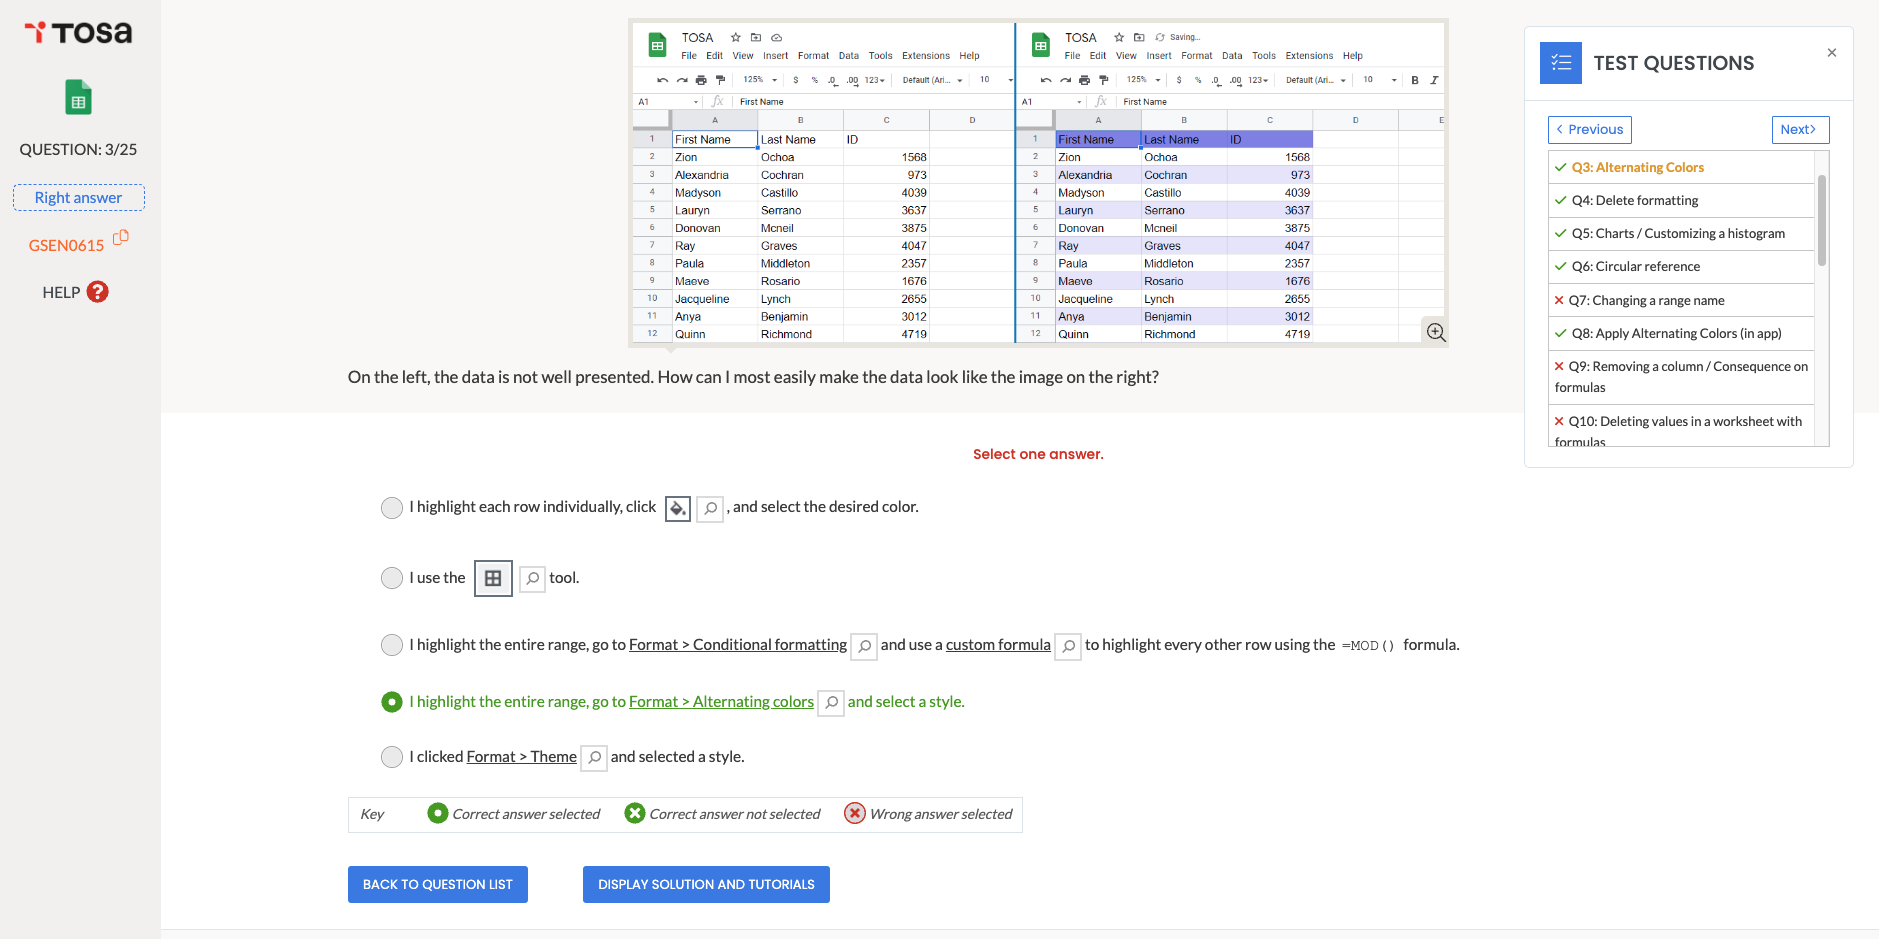
2) View Answers: (assessments only) see the question list, time spent per question and your student’s answers.
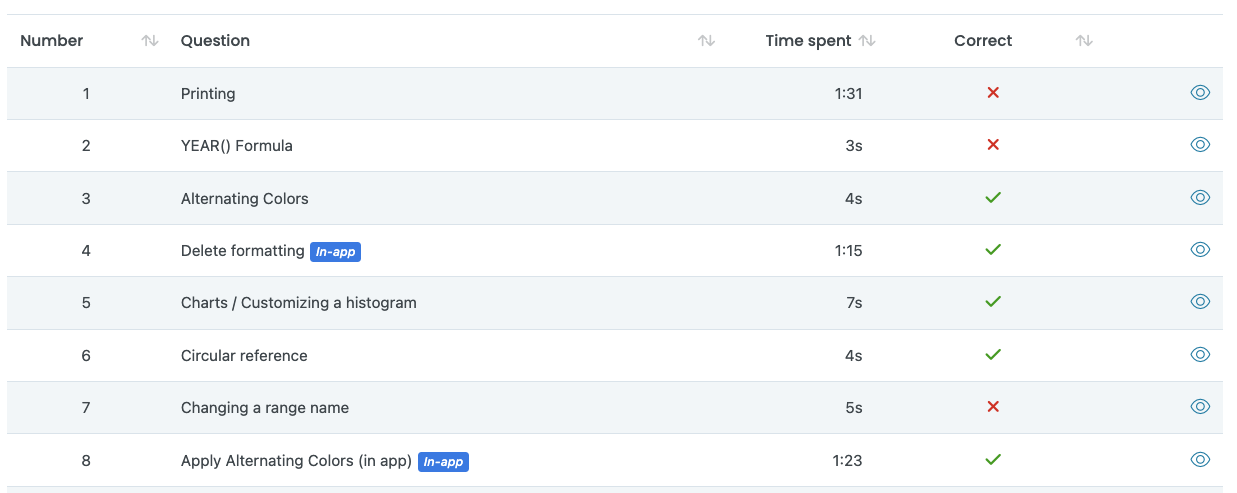
This data can be exported as an Excel file.
View the question’s content by clicking on the little eye Icon.

Navigate through all questions using the floating Test questions window. Exit the questions interface by clicking on the small (x) next to Test questions.
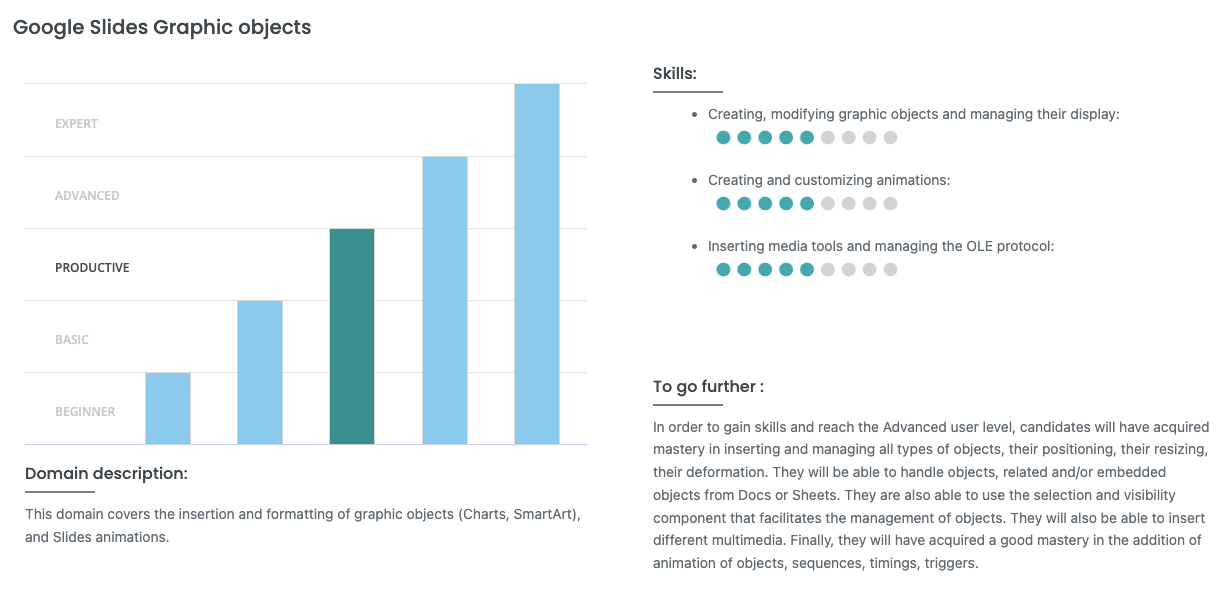
3) Skill levels: (assessments only) See the test’s domains description ans skills assessed along with the student’s level of proficiency and a sum up of the areas of improvements.
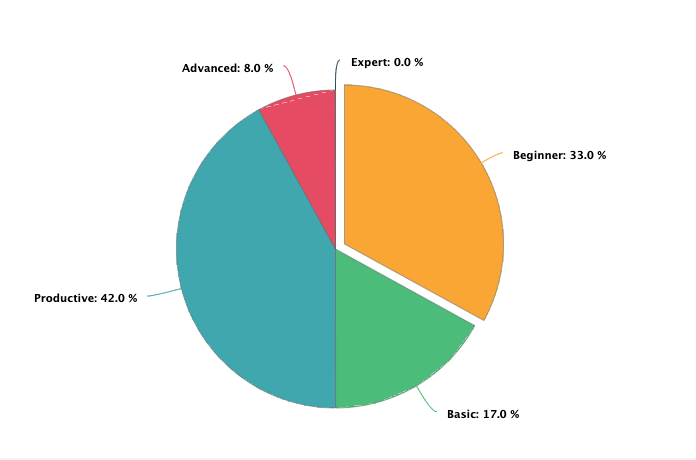
(4) Ranking: Pie chart showing a breakdown of your students’ level
Reports & Diploma
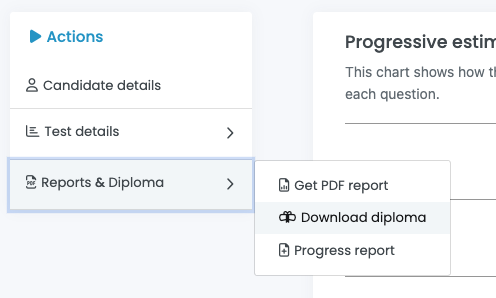
Clicking on Reports & Diploma will open a window with 3 choices:
- (1) Get PDF report: After choosing the report’s language, the system will make the test’s report available for download.
-
(2) Download diploma: Once a student’s Tosa certification has been validated by Isograd, an administrator can download the diploma. If the diploma is not yet validated, the option will not be available.
-
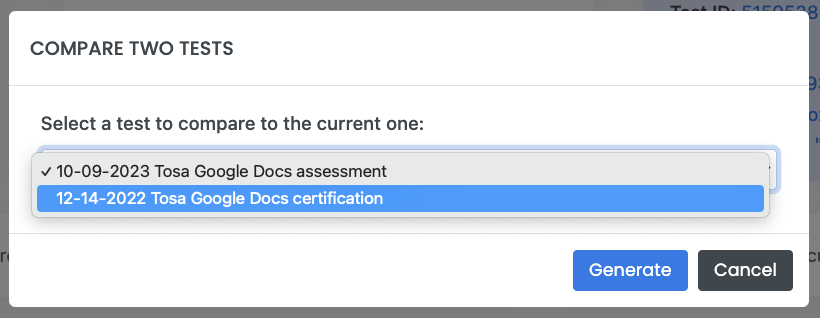
(3) Progress report: Generate a progress report by comparing your student’s test to another one on the same subject. This can be an assessment or a certification.
Group Reports
Group Reports allow administrators to get more insights about their groups and students.
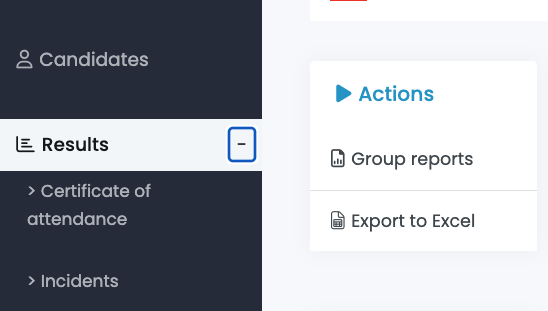
Group reports are accessed from the Results menu.
The administrator must select a set group from the group dropdown menu.
Once a group is selected, click on Group reports and the Group reports menu will appear.
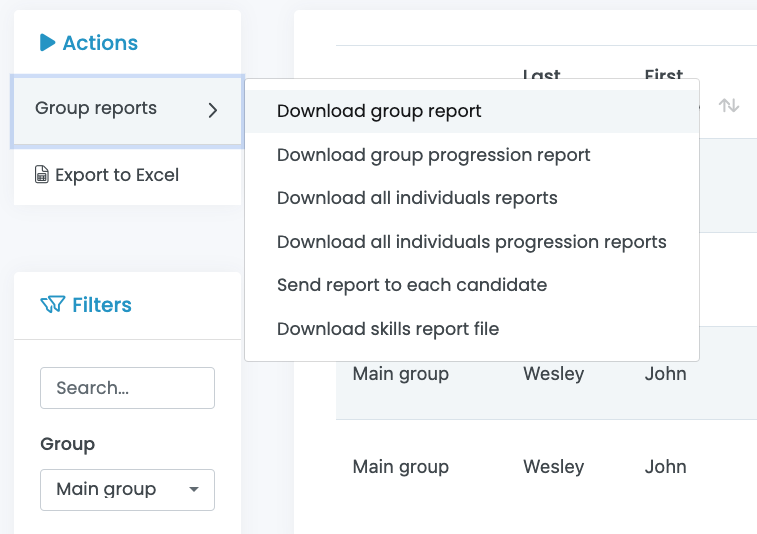


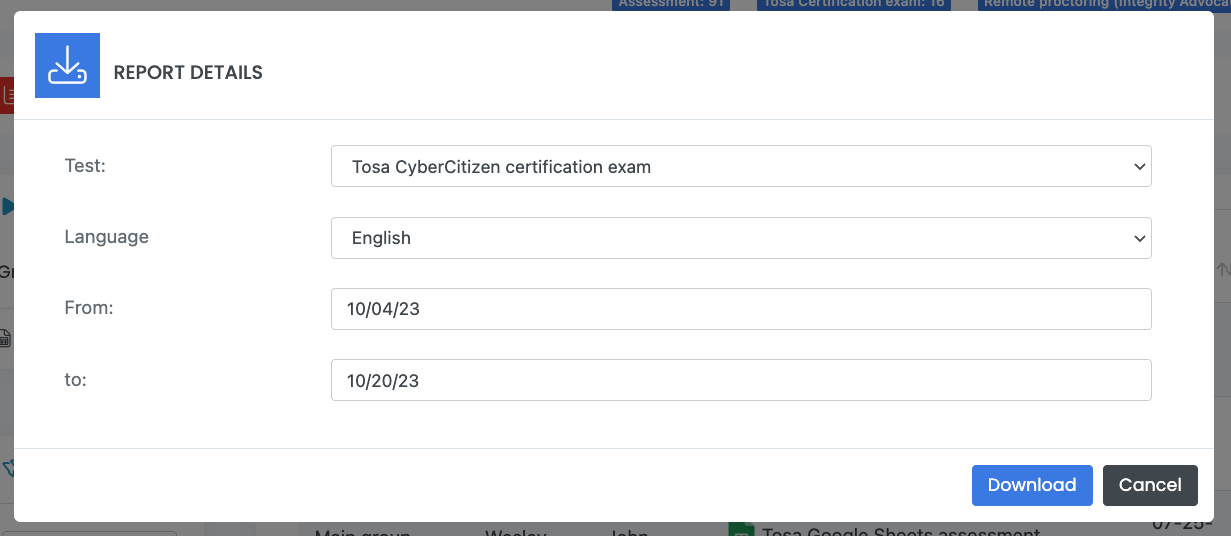
- (1) Download group report: This will allow you to download a group report
In the Report Details window, select the test and the date range you want to view and click on Download. The group report PDF contains information such as charts showing the distribution of your student’s results per level as well as the ranking of the group.
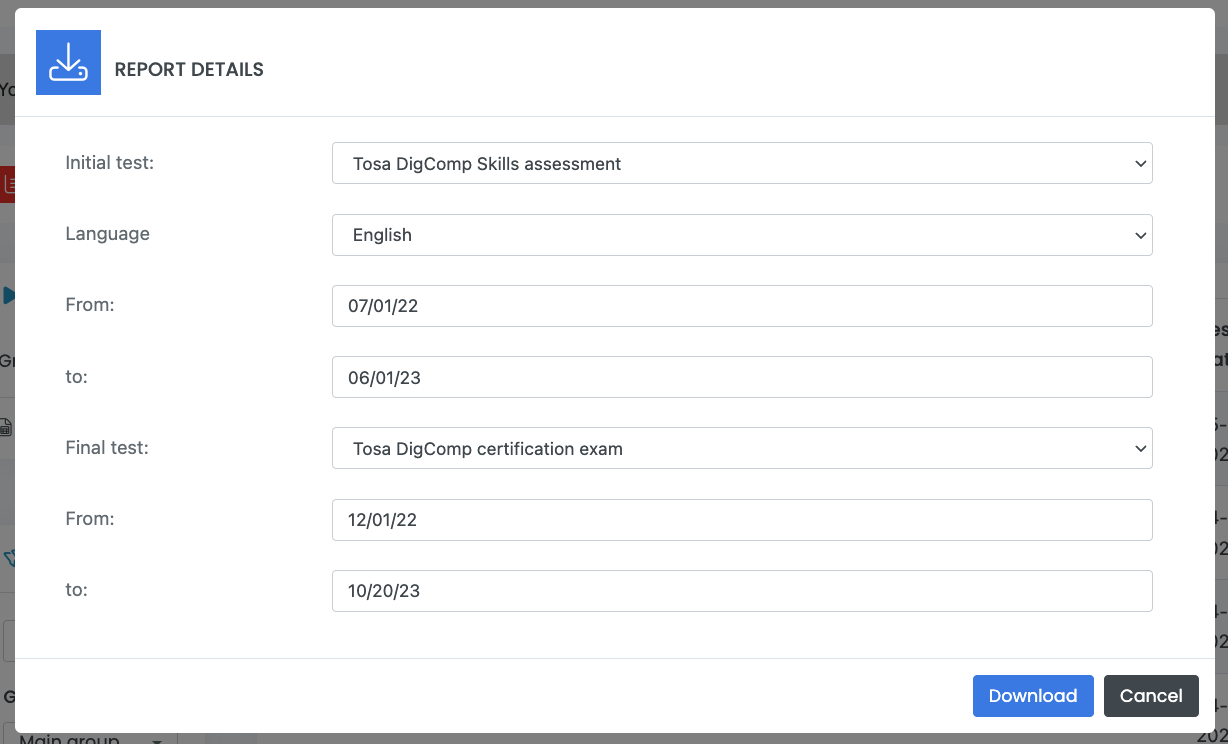
- (2) Download group progression report: Click on this option to see the progression of a group. From an assessment to another, or from an assessment to a certification. Select the tests and the date range you want to view and click on Download.
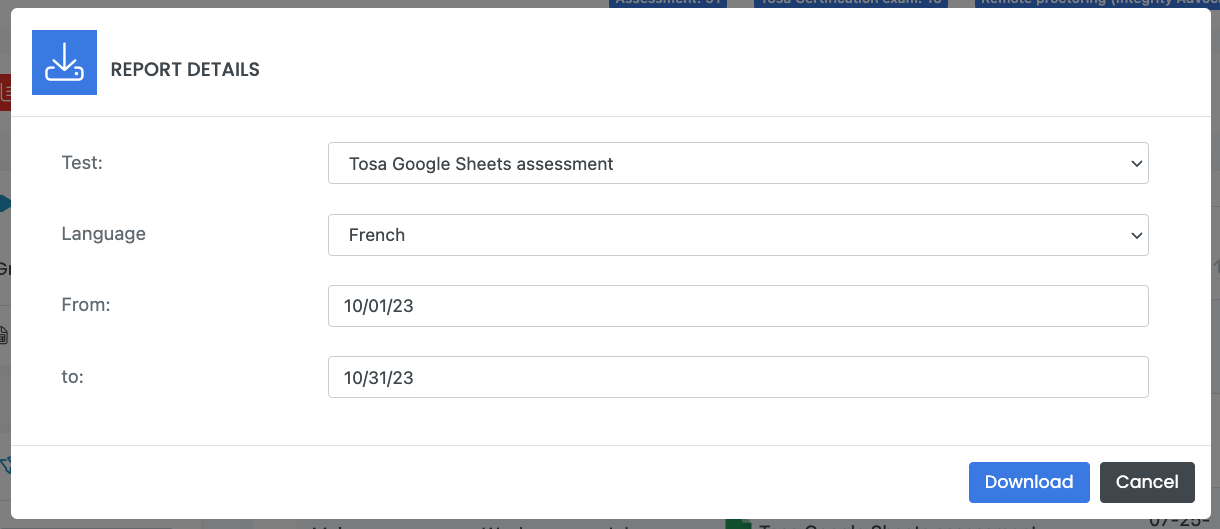
- (3) Download all individual reports: This option allows administrators to get all reports for group members versus downloading each individual report. These reports will be sent to you by email within 24 hours.
Select the test and the date range you want to get the reports from and click on Download.
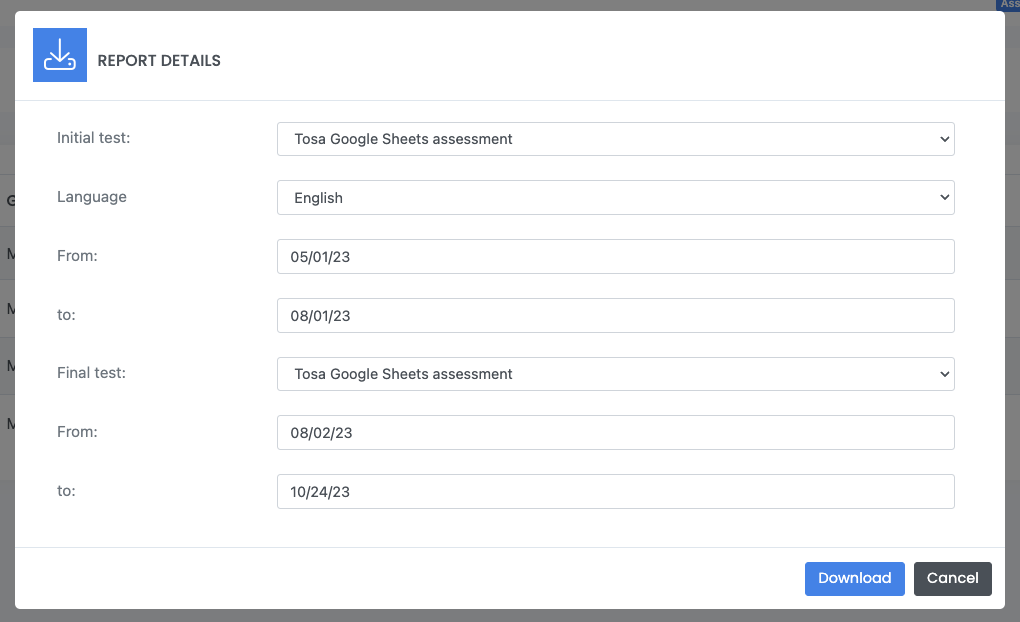
4) Download all individual progression reports: Select the two tests you want to compare the date range for each student. Note: the two time periods must not overlap. Each report will show the results from both tests and provide the comparison of the two tests against each other.
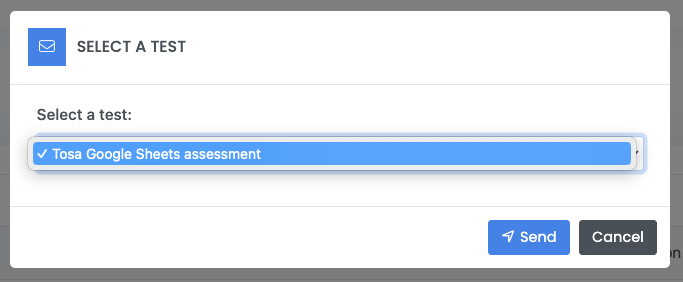
- (5) Send report to each candidate: Allows you to send assessment reports to all the students of a group. Select the test and click Send.
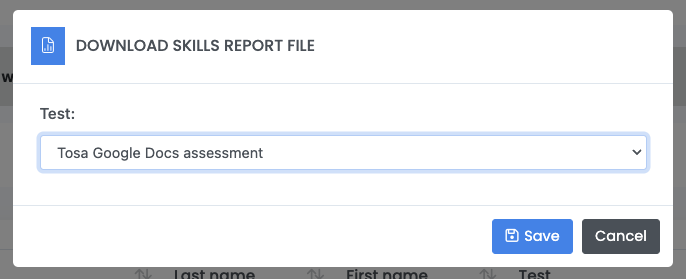
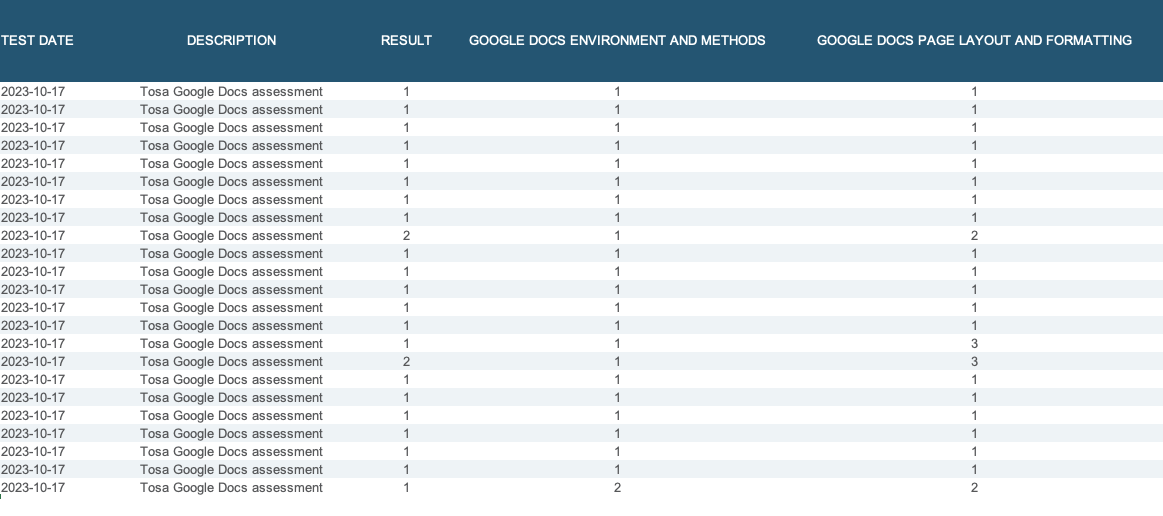
- (6) Download skills report file: With this option, you will be able to download an Excel file containing the selected group’s students test result along with the skill level in each domain assessed. Select the test and click Save. You will then be able to download the file to your computer.
Certificate of attendance
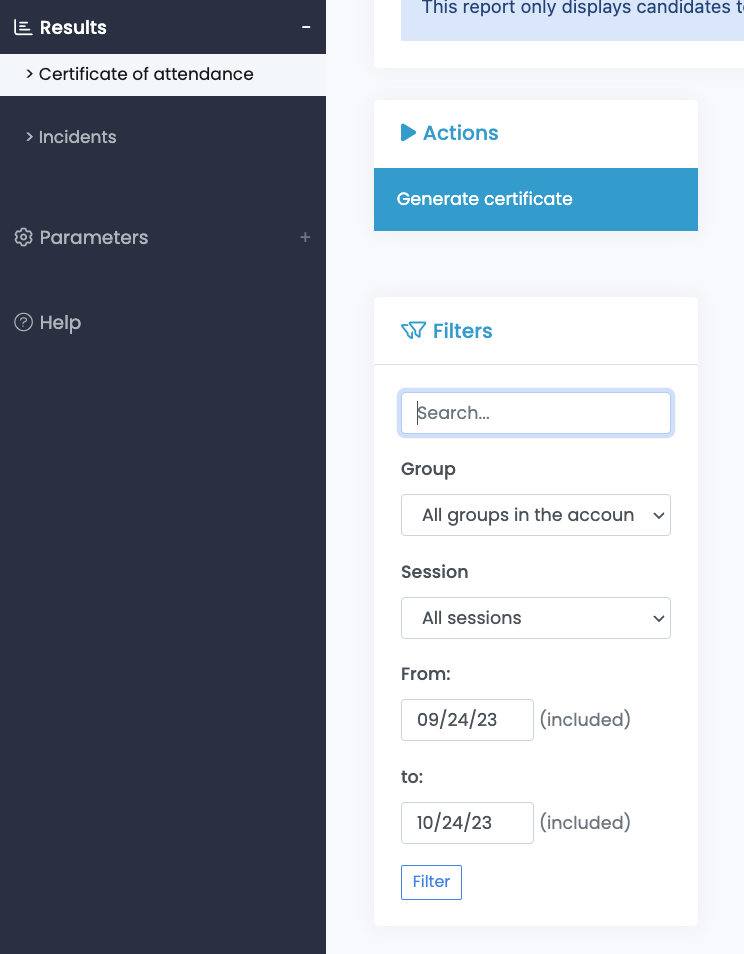
You will be able to download certificates of attendance from the Certificate of attendance submenu under Results in the main menu.
Use the Filters submenu to search for your students. You can search by keyword (student name), group, session and date range. Click on the Filter button.
Click on Generate certificate and the Certificate Generation window opens.

Choose the type of certificate you want to generate (individual or all-in-one) and select whether or not you want the score to be displayed. Click on Generate.
Incidents
During a Tosa certification exam, if a student exits full-screen browser mode, a record is created with a “Details Pending” status for which you will have to provide an explanation so that the student can receive their diploma.
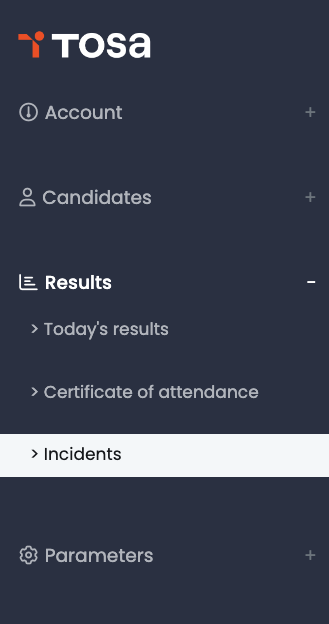
To do so, click on Results, then click Incidents.
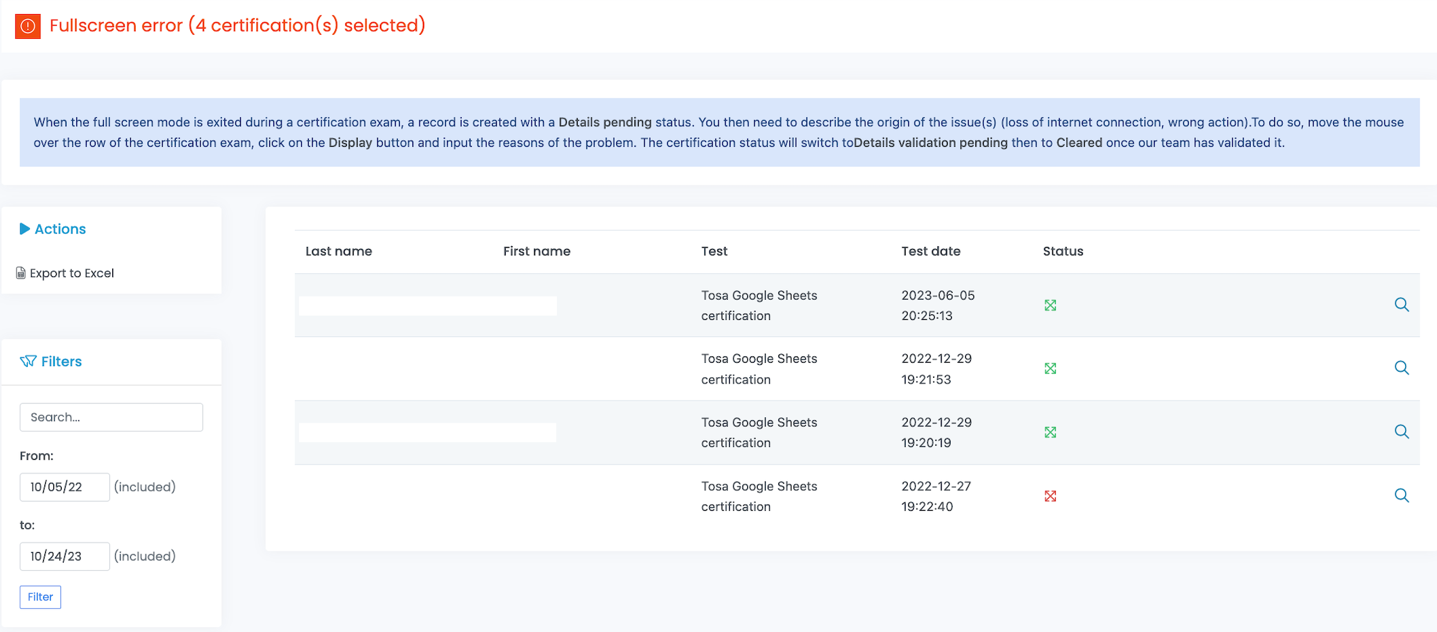
The Fullscreen error window will open. The pending status test will be marked for you to describe the origin of the issue(s). To do so, click on the Magnifying glass icon, and input the reason(s) for the interruption.
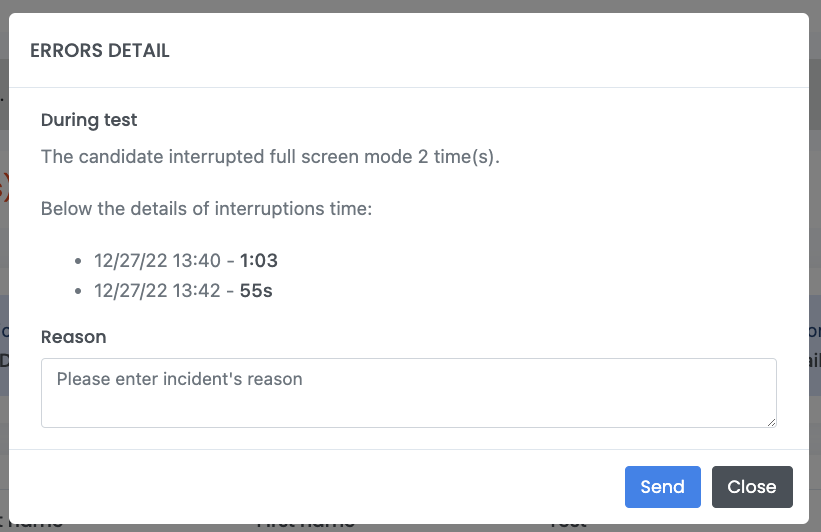
The certification status will switch from “Details validation pending” to “Cleared” once a member of the Validation Team has reviewed and validated the error.
#
Support
Help
The Help Section of the platform contains all technical information on the platform and on the tests.
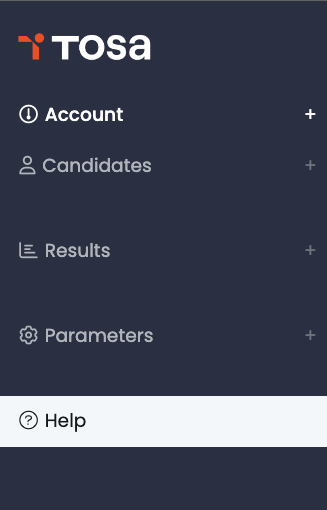
To access the Help Menu, select Help from the main menu.
In this Help section, you will be able to find the following:
-
Technical support contact details
-
Your current Internet browser version
-
Technical Configuration mini test and link
-
Tosa Platform manual
Technical configuration
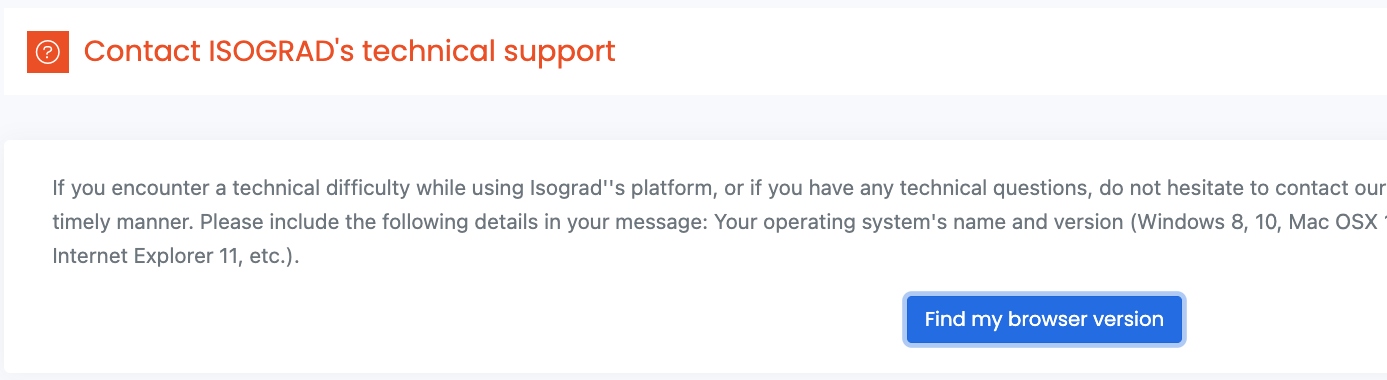
The Find my browser version’s button will display your browser’s current version.
Technical Configuration mini test
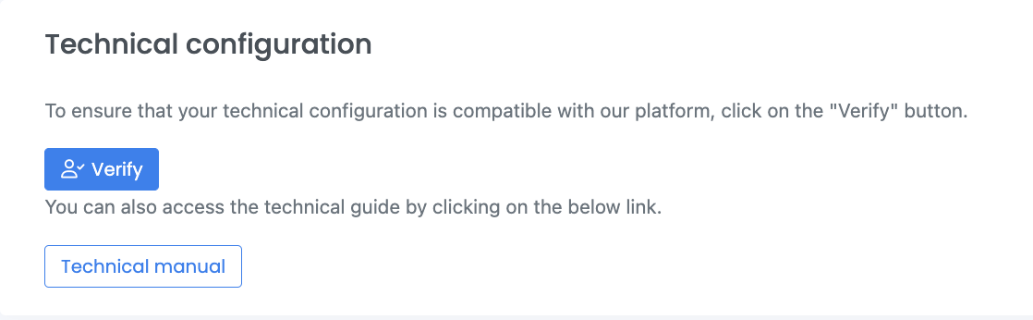
Run a 3 questions test to check your computer, browser and network’s compatibility with the Tosa platform. Click the Verify button
Once you have clicked Verify, you will be provided the option to test either an assessment or certification.
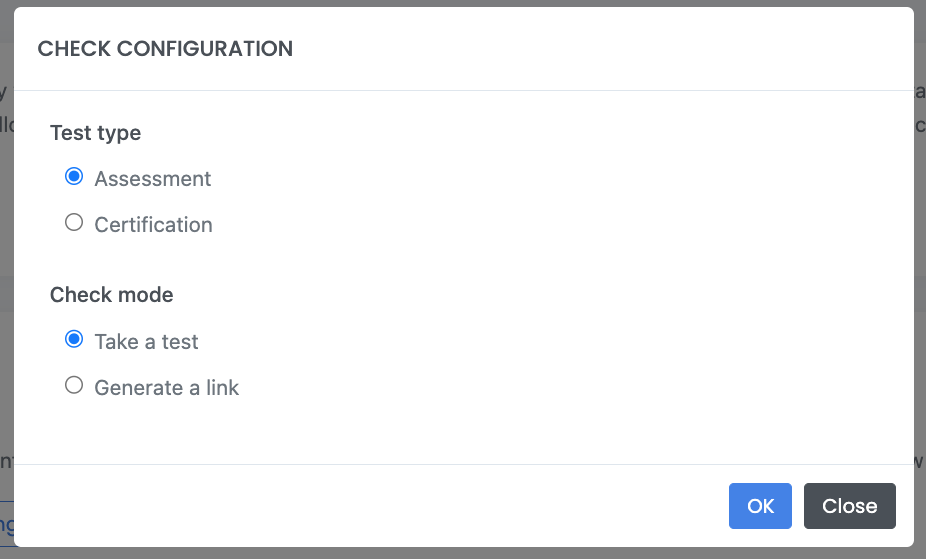
A short, three-question test that emulates either an assessment or a certification will launch. Each of the questions corresponds to different question types that students will encounter. These questions do not require any specific knowledge of any application.
Please follow the instructions and answer the questions.
You can also generate a one-time link that can be copy and pasted in an email, allowing for the check of the technical configuration on another computer. Sending this link to a student is a good way to ensure their system will be running the test(s) smoothly.
If any technical issues arise, do not hesitate to contact Isograd Support Team at support@isograd.com.