Administrator management
An administrator is a user with access to the administration console of your account. This chapter describes how to add, edit, disable, delete an administrator, and how to fine-tune their privileges on the platform.
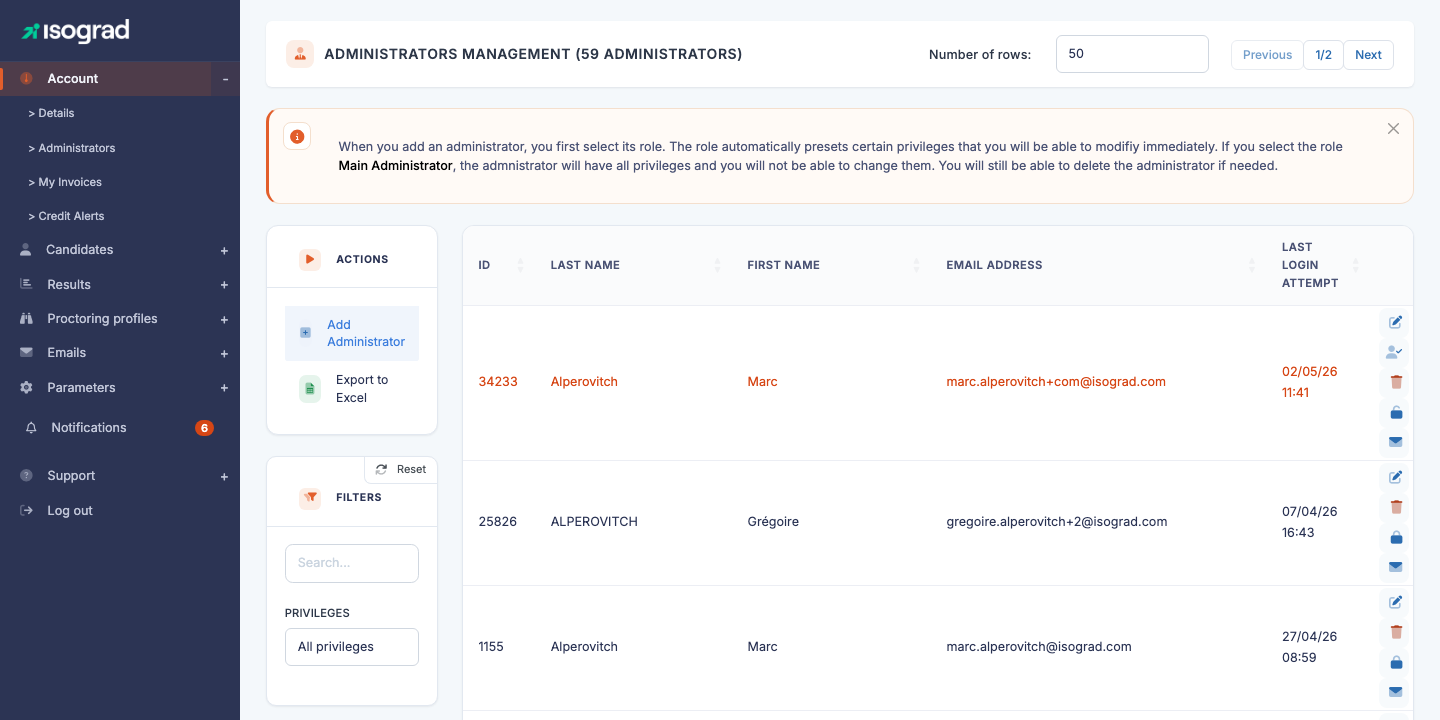
The Administrator management page lists all administrators created on your account. Each row indicates the last name, first name, email address and date of last login attempt. The filters at the top of the page let you narrow the list by free text or by privilege. The action buttons — Create an administrator and Export to Excel — are located in the action bar at the top of the table.
Administrator types
The platform distinguishes two main profiles for the administrators of a customer account:
- Main administrator — has all the rights on the account: they can manage all candidates, all groups, modify the account settings, and create or revoke other administrators. There is generally only one main administrator per account.
- Group administrator — restricted access to the candidates and results of the groups they are in charge of managing, as well as to public groups. Ideal for delegating the management of a class, a department or a client to a local manager without opening the whole account to them.
The profile is chosen at the time of creation (see Add an administrator). Beyond the profile, the fine-grained privileges (read/write/delete on candidates, email templates, sessions, etc.) are adjustable individually — see Edit privileges.
Add an administrator
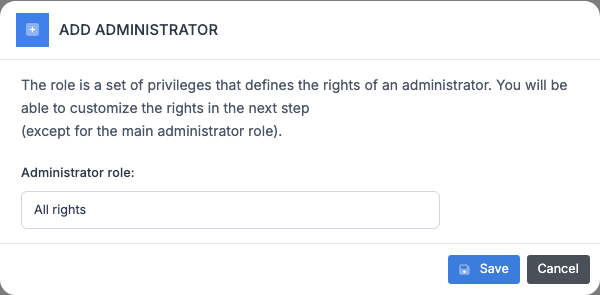
Creating an administrator is done in two steps: choice of role, then entry of contact details.
Step 1 — Choice of role
-
From the Administrator management page, click Create an administrator.
-
In the window that opens, choose the role from the drop-down list (Main administrator, Group administrator, etc.).
-
Confirm. The platform immediately creates an empty record and opens the contact details entry window.
Step 2 — Contact details
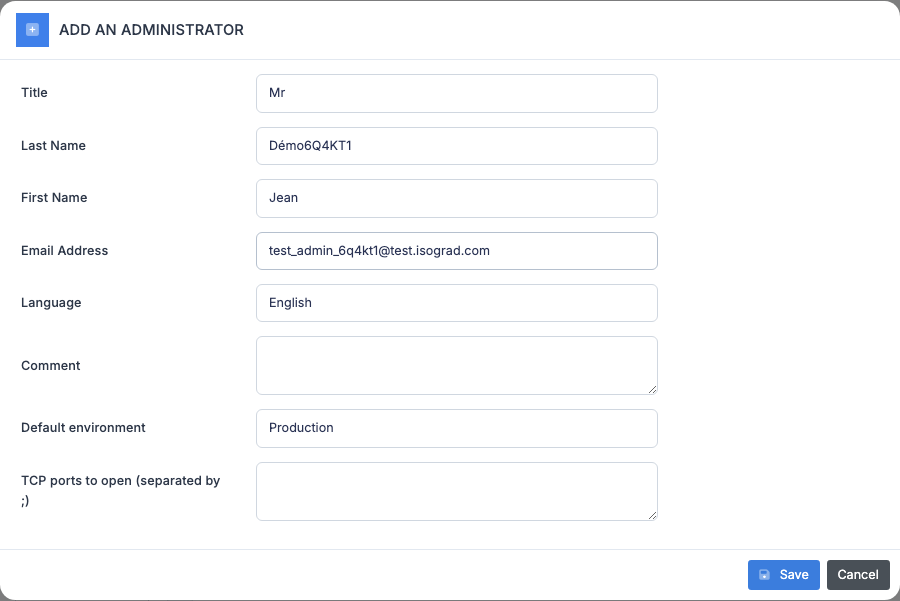
Fill in the fields:
- Title — Mr. / Mrs.
- Last name — family name.
- First name — given name.
- Email address — used both as login identifier and notification address. Must be unique on the platform.
- Language — interface language for this administrator. System emails (password reset, etc.) are also sent in this language.
Click Save to confirm the creation. The new administrator appears immediately in the table.
💡 Initial password — No password is requested from you. The administrator will set it themselves via the first-access link sent to their email address. See Send credentials to resend this link if needed.
Edit an administrator
-
On the Administrator management page, locate the row of the administrator to edit.

-
Click the Edit icon (pencil) at the end of the row. The edit window opens.

-
Edit the desired fields (title, last name, first name, email address, interface language).
-
Click Save. The changes are applied immediately.
💡 Change your own interface language — This same window lets you change your own language: locate your row in the table and click the Edit icon. After saving, log back in for the change to take effect (the language is cached in the session at the time of login).
Edit privileges
Privileges are fine-grained rights (read, write, delete) on the various resources of the platform: candidates, groups, sessions, email templates, etc. You can adjust them individually for each administrator, in addition to the role chosen at creation.
Procedure
-
On the Administrator management page, locate the administrator’s row. Click the Privileges icon (silhouette with a check mark) at the end of the row.
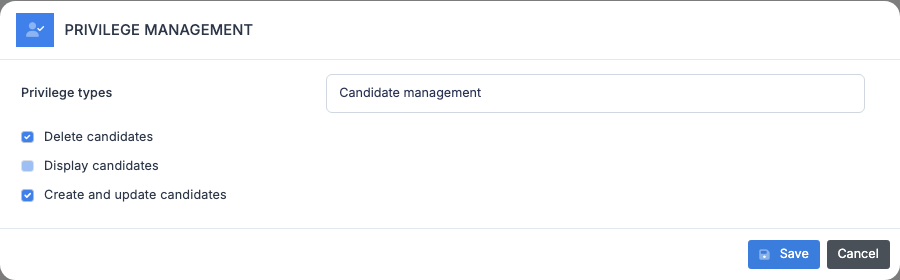
-
The window displays the privileges grouped by category (Candidates, Sessions, Emails, Results, etc.). For each privilege, a check box indicates whether the administrator has it.
-
Check or uncheck the desired privileges.
-
Click Save. The new privileges are active immediately.
Reading the privileges
Each resource generally exposes three levels:
- Read — the administrator can view but not modify.
- Write — the administrator can create and modify.
- Delete — the administrator can delete records.
Some privileges are cross-cutting; for example Read/write the emails of another administrator allows an administrator to manage the email templates created by their colleagues, and not just their own.
⚠️ Privileges and role — Fine-grained privileges add to the role, they do not replace it. A Main administrator already has all privileges by default; the Privileges window is mainly used to open up additional access to a Group administrator.
Filter by privilege
The All privileges filter at the top of the main page lets you isolate the administrators holding a given privilege. This is useful, for example, to quickly identify the administrators who can delete candidates before reviewing their rights.
Disable and unlock an administrator
Disabling prevents an administrator from logging in, without deleting their account or data. They can be re-enabled (“unlocked”) at any time.
Disable
- On the administrator’s row, click the Disable icon (closed padlock).
- Confirm the action.
- The Disable icon is replaced by an Unlock icon (open padlock), indicating that the account is now blocked.
Unlock
- On the row of a disabled administrator (or one locked after several unsuccessful login attempts), click the Unlock administrator icon.
- The administrator can log in normally again.
💡 Disabling vs deleting — Prefer disabling when you want to temporarily withdraw access — for example, a colleague on extended leave. Reserve deletion for accounts created in error or for definitive departures: deletion is irreversible and causes loss of the event history attached to the administrator.
⚠️ You cannot disable yourself — The Disable button does not appear on your own row. To transfer an account, first create a new main administrator, ask them to log in at least once, then ask them to disable your old account.
Reset 2FA
If two-factor authentication (2FA) is enabled on the account and an administrator has lost access to their authentication application, you can reset their 2FA so they reconfigure it on their next login.
- On the administrator’s row, click the Reset 2FA icon (key icon).
- Confirm the action.
- On their next login, the administrator will be prompted to re-scan a QR code and reconfigure their authentication application.
💡 Availability — The Reset 2FA icon only appears if two-factor authentication is enabled for your account. If you do not see it, it means the account does not use it — there is then nothing to reset.
Send credentials
The Send credentials button sends the administrator an email containing a password reset link. This is the action to use in two cases:
- The administrator has just been created and has not yet received (or has lost) their first-access link.
- The administrator no longer remembers their password — rather than asking them to click “Forgot password” on the login page, you can push the link to them from the admin console.
Procedure
- On the administrator’s row, click the Send credentials icon (envelope icon).
- The platform sends the email immediately — no further confirmation is requested.
- A success notification appears at the top right of the screen.
💡 Link validity — The reset link has a limited lifetime. If the administrator does not use it within the allotted time, resend a new one via the same procedure.
Delete an administrator
- On the administrator’s row, click the Delete icon (trash can).
-
A confirmation window appears.
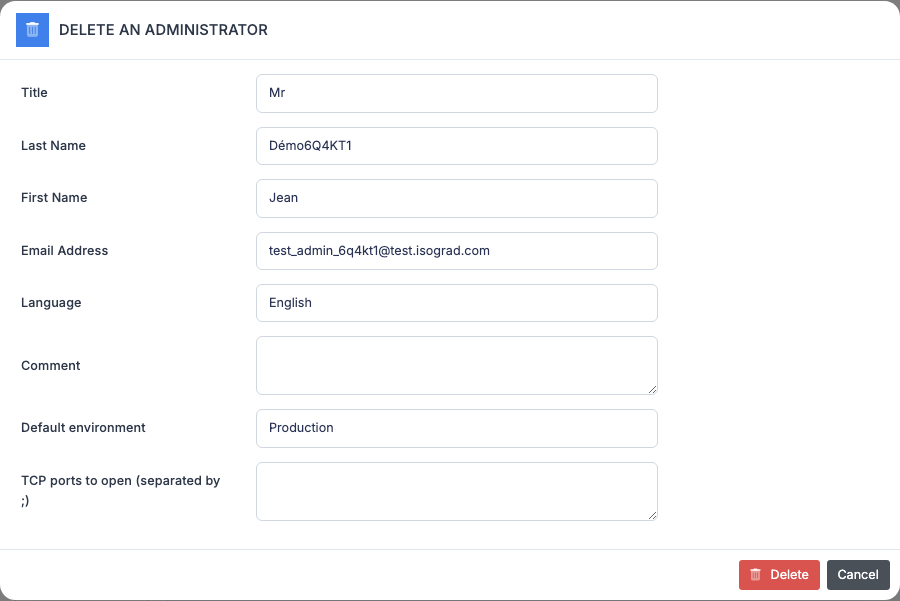
- Confirm. The administrator is deleted immediately.
⚠️ Permanent deletion — Unlike disabling, deletion is irreversible. Records attached to this administrator (for example, the private email templates they had created) become orphaned or are also deleted depending on the case. Before deleting, prefer disabling if the goal is only to cut off access.
💡 You cannot delete yourself — As with disabling, the Delete button does not appear on your own row.
Export the list
The Export to Excel button in the action bar generates an .xlsx file listing all administrators filtered on screen at the moment of the click. The export includes, in addition to the visible columns, the detailed list of privileges of each administrator — a very useful view for periodically auditing who can do what on your account.